Bringing this website to 2019 with Dokku, GitHub Actions, Terraform Cloud, and Mailcow
For over a year, this website operated in a fairly simple way: a lonely Digital Ocean’s Droplet was running a MySQL database and a Ghost CMS instance behind a Nginx webserver. Over the past few weeks, I decided to pimp the server up just a little bit.


For over a year, this website operated in a fairly simple way: a lonely Digital Ocean’s Droplet was running a MySQL database and a Ghost CMS instance behind an Nginx webserver. Over the past few weeks, I decided to pimp the server up just a little bit. This will not necessarily be a how-to type article but rather more of a lengthy humble-brag.
Old server, good server 🖥️
To expand a bit on the introduction, the old setup consisted of a manually provisioned $10/month[1] Digital Ocean Droplet with Ubuntu 18.04 on which was installed MySQL database to store articles, Ghost CMS to serve content and Nginx to work as a reverse proxy. Ghost CLI also managed SSL certificates (issued via Let’s Encrypt), and anytime there was a new update of Ghost (& I didn’t feel particularly lazy to skip the update), the update procedure consisted of SSHing into the server, running sudo apt update; and sudo apt upgrade; and sudo npm install -g npm@latest; and ghost update and praying that everything will go well, because ain’t nobody got time for back-ups 😬
Finally, the DNS records were first managed by Cloudflare; then after Cloudflare dropped 8chan like a hot potato 🥔, I dropped Cloudflare harder than a mic 🎤⬇️ and moved to Amazon’s Route 53; a few months later I decided that paying $0.50 every month just for hosting a few DNS entries is a luxury I can’t afford and migrated the DNS records one more time to Digital Ocean.
Everything was done manually. How utterly boring 😪
Let’s start from scratch… 🐱
For quite some time, I’ve been a big fan[2] of the Dokku project – a lovely, self-hosted PaaS (Platform as a Service) that resembles Heroku in all the good ways (such as user comfort and the concept of “it-just-works”) while leaving behind all the bad things – namely, paying an arm 💪 and a leg 🦵 for the comfort of not having to deal with infrastructure.
Dokku uses Docker containers to run applications and offers several ways of turning your code into a container. You can either deploy a built container from Docker registry, have Dokku build your container based on a traditional Dockerfile, or even use Heroku’s buildpacks to turn a simple git push command into container building magic ✨. In this article, I’ll use a mixture of these methods, depending on each project.
Seeing that Ghost 👻 offers pre-built official Docker images on Docker Hub, I decided to begin my at-that-time-only-an-experiment. I provisioned another Droplet on Digital Ocean (still manually, but I’ll fix this mistake later in the article), secured it, pointed a test subdomain (new.milanvit.net) at the newly created Droplet and installed Dokku. Migrating my existing blog from a stand-alone setup to a Dokku-managed one was a fairly straight-forward process:
- Create a new Dokku app with
dokku apps:create blog - Install Dokku plug-in for provisioning MySQL databases with
sudo dokku plugin:install https://github.com/dokku/dokku-mysql.git mysql - Provision a fresh MySQL database with
dokku mysql:create blog-db - Link the created database with the Ghost container with
dokku mysql:link blog-db blog - Provide Ghost with the MySQL configuration variables with
dokku config:set --no-restart blog database__client=mysql database__connection__host=dokku-mysql-blog-db database__connection__user=mysql database__connection__password=<sup3rs3cr3t> database__connection__database=blog_db, since Ghost doesn’t read the de-facto standardDATABASE_URLenvironment variable that Dokku provides automatically after linking [3] - Dump the entire database from the old server, replacing the database name in the dump with
blog_db(new database name); then copy the dump to a new server withscpand import it withdokku mysql:import blog-db < dump.sql - Copy the entire
/var/lib/ghost/contentfolder from old server withrsynconto new server, into/var/lib/dokku/data/storage/blog; then mount this folder into Ghost container withdokku storage:mount blog /var/lib/dokku/data/storage/blog:/var/lib/ghost/content - Pull at-that-time most up-to-date Ghost image with
docker image pull ghost:2.31.1and re-tag it withdocker image tag ghost:2.31.1 dokku/blog/2.31.1so that Dokku can recognize it and associate it with an app - Deploy the image with
dokku tags:deploy blog 2.31.1 - Adjust port mapping with
dokku proxy:ports-add blog http:80:2368anddokku proxy:ports-remove blog http:80:5000, as the official image opens and exposes port 2368, not 5000
At that point, new.milanvit.net subdomain served the same content as www.milanvit.net, except in a much cooler way! 🤩 After playing around for a bit and finding only minor issues that I’ll describe in a moment, I decided to switch the DNS so that www.milanvit.net[4] points at the new Droplet. After the DNS change sufficiently propagated, I obtained new SSL certificates with few more simple commands:
- Install Let’s Encrypt plugin with
sudo dokku plugin:install https://github.com/dokku/dokku-letsencrypt.git - Prepare the application for certificate request with
dokku config:set --no-restart blog [email protected] - Now that Dokku is running at the apex domain rather than a subdomain, fix domain mapping with
dokku domains:set-global milanvit.net,dokku domains:remove blog blog.milanvit.netanddokku domains:set blog milanvit.net www.milanvit.net - Configure a 301 redirect with
sudo dokku plugin:install https://github.com/dokku/dokku-redirect.gitand`dokku redirect:set blog milanvit.net www.milanvit.net, which I’m still unsure if it was even necessary, but it seems to be doing no harm, so… 🤷♂️ - Finally, obtain an SSL certificate with
dokku letsencrypt blog– yes, it’s that simple! 🔑 - Fix one small issue related to the admin panel with
dokku config:set blog url=https://www.milanvit.net
Blog is running… now what? 🤔
After doing all of the above (and being properly satisfied with the result), I thought I can now comfortably run my other projects on various subdomains. I quickly converted one React.js website that I wrote for a friend/co-worker from a static website hosted on S3 into a static website served by Dokku, deleting the entire S3 bucket in the process (and later, I re-wrote the entire site into Vue.js because if I’m doing the infrastructure and deployment in a cool way, the code should not slack behind).
And after that was done as well, I deployed one Laravel application I wrote for me and my wife for tracking daily housework in a way fairly similar to the Ghost blog (it required MySQL & persistent storage), and then another Laravel application that required quite a bit more setup, as the application requires a mail server (via Mailgun in production), Redis cache (via Dokku’s Redis plugin), persistent storage, Algolia credentials (& search index) and just about trillion various environmental variables just to run properly. But all of that was done without breaking (too much) sweat! 🤩
Magical buildpack deployment 🚀
For deploying the two Laravel applications, I chose the Heroku-like buildpack deployment. Configuring the deployment was a fairly trivial process:
- Add new Git remote with
git remote add dokku dokku@web:kaji, wherewebis my SSH alias andkajiis the Dokku application name - Add a
Procfilefile to the repository root folder with the following content:web: vendor/bin/heroku-php-nginx -C nginx.conf public, since we want Nginx to serve the content (although Apache is also possible, and requires a bit less configuration) - Add a
.buildpacksfile to the repository root folder with the following two lines, which indicate that this project contains not only PHP code but also requires thenpm run buildcommand to be run before deployment finishes
https://github.com/heroku/heroku-buildpack-nodejs.git
https://github.com/heroku/heroku-buildpack-php.git
- Add an
nginx.conffile to the repository root folder with the following content:
add_header X-Frame-Options "SAMEORIGIN";
add_header X-XSS-Protection "1; mode=block";
add_header X-Content-Type-Options "nosniff";

index index.php index.html index.htm;

charset utf-8;

gzip on;
gzip_comp_level 5;
gzip_min_length 256;
gzip_proxied any;
gzip_vary on;
gzip_types
  application/atom+xml
  application/javascript
  application/json
  application/ld+json
  application/manifest+json
  application/rss+xml
  application/vnd.geo+json
  application/vnd.ms-fontobject
  application/x-font-ttf
  application/x-web-app-manifest+json
  application/xhtml+xml
  application/xml
  font/opentype
  image/bmp
  image/svg+xml
  image/x-icon
  text/cache-manifest
  text/css
  text/plain
  text/vcard
  text/vnd.rim.location.xloc
  text/vtt
  text/x-component
  text/x-cross-domain-policy;

location / {
    try_files $uri $uri/ /index.php?$query_string;
}

location = /favicon.ico { access_log off; log_not_found off; }
location = /robots.txt  { access_log off; log_not_found off; }

error_page 404 /index.php;

location ~ /\.(?!well-known).* {
    deny all;
}
- Finally, commit everything and push with
git push dokku
Following the push, I could observe the buildpack doing its magic by downloading Node.js, NPM, compiling JavaScript assets and finally spitting out a finalized Docker image, ready for Dokku to serve it. Well, that’s all nice and dandy, but who’s got time for deploying things manually these days? 😅
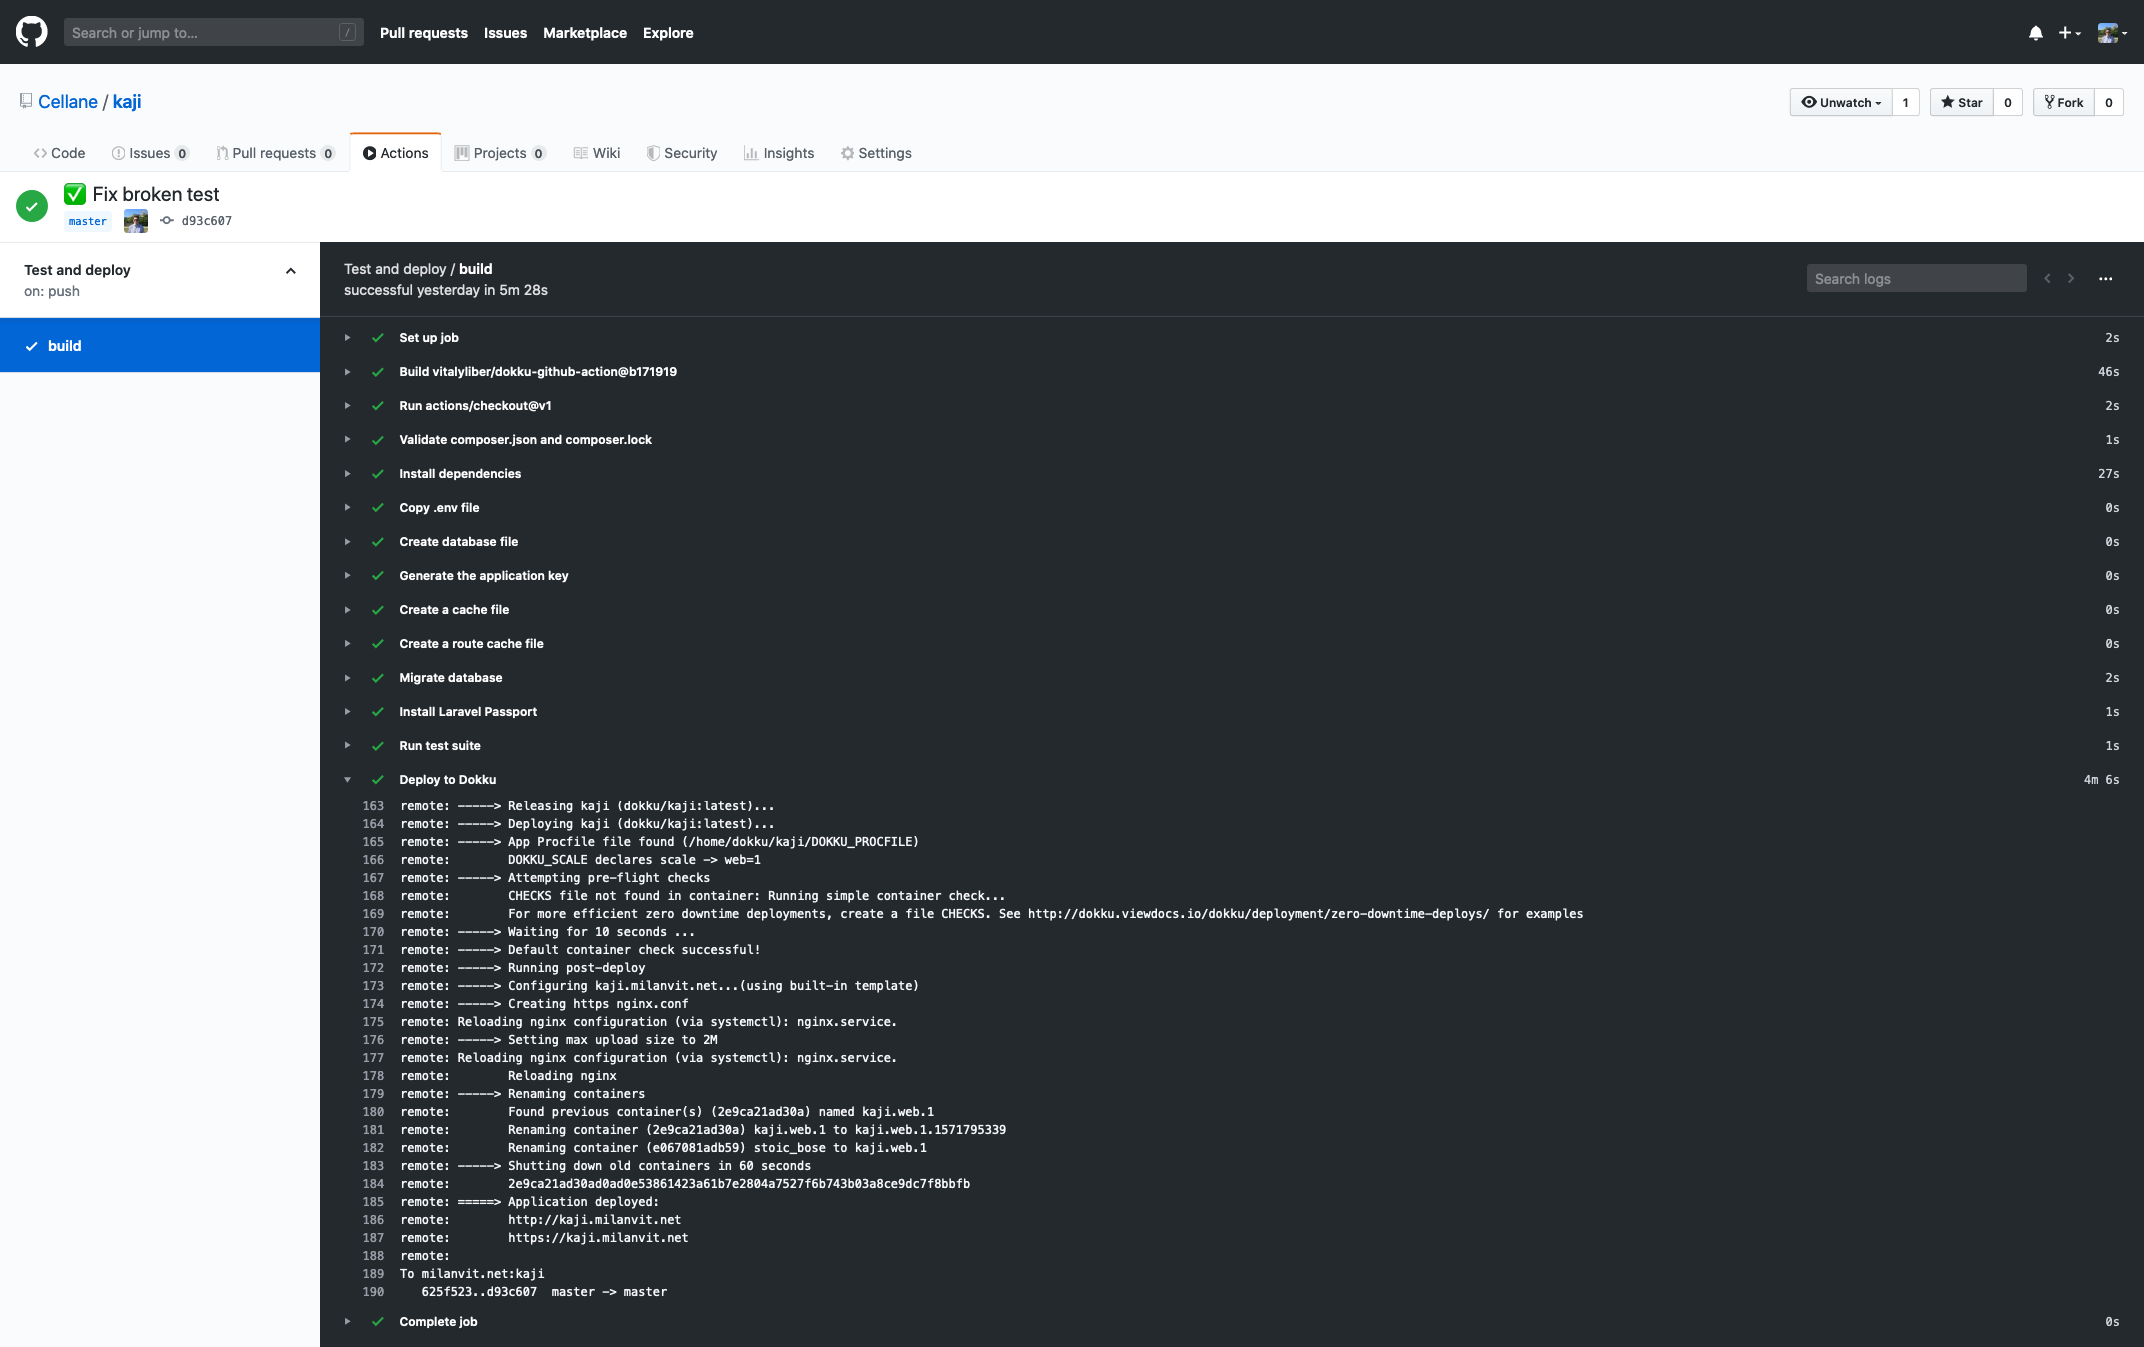
Fortunately, my GitHub account got recently access to GitHub Actions Beta, so why not take this CI system for a spin? After a bit of trial & error, I managed to create a workflow that configures my Laravel application so that it can run unit & feature tests, then runs the tests and if everything passes, the workflow triggers another push to my Dokku server (by running a community-contributed GitHub Action), which in turn causes application container to be built and deployed. Automation for the win!
More automation! 🤖
So that’s deployment handled in a sufficiently cool way I suppose, but I admit I totally neglected the infrastructure up to this point. Why manage everything manually from the Digital Ocean panel when I can use Terraform instead?
And so I did – I mapped the existing infrastructure (consisting of one Droplet and many many DNS records) into a Terraform project, and anytime I was finished with a resource definition, I imported it to my Terraform state via the terraform import command – super useful! 👏 Since the code itself contains no private data, I published it on my GitHub profile, so you can judge me over my very liberal usage of the for_each statements in domain definition.
This is already an improvement, but just like I don’t want to run git push dokku locally to deploy, I don’t want to run terraform apply locally either – yes, my laziness truly knows no bounds.
Well, I remembered hearing about Terraform Cloud some time ago, and upon reading about it just a bit more, it seemed to be exactly what I’d need – Terraform Cloud handles Terraform state, secrets and even offers remote Terraform execution. After setting up my Terraform Cloud account and connecting it with the GitHub repository I published earlier, it was just a matter of few clicks (and storing my Digital Ocean access token as a Terraform secret variable) & changing the Terraform back-end in my Terraform code to achieve the following:
- anytime there’s a new commit in a Pull Request, run
terraform planto verify the possibility of successful execution, as well as to validate the Terraform syntax itself; - anytime a PR is merged to
master, runterraform applyto bring the changes to reality.
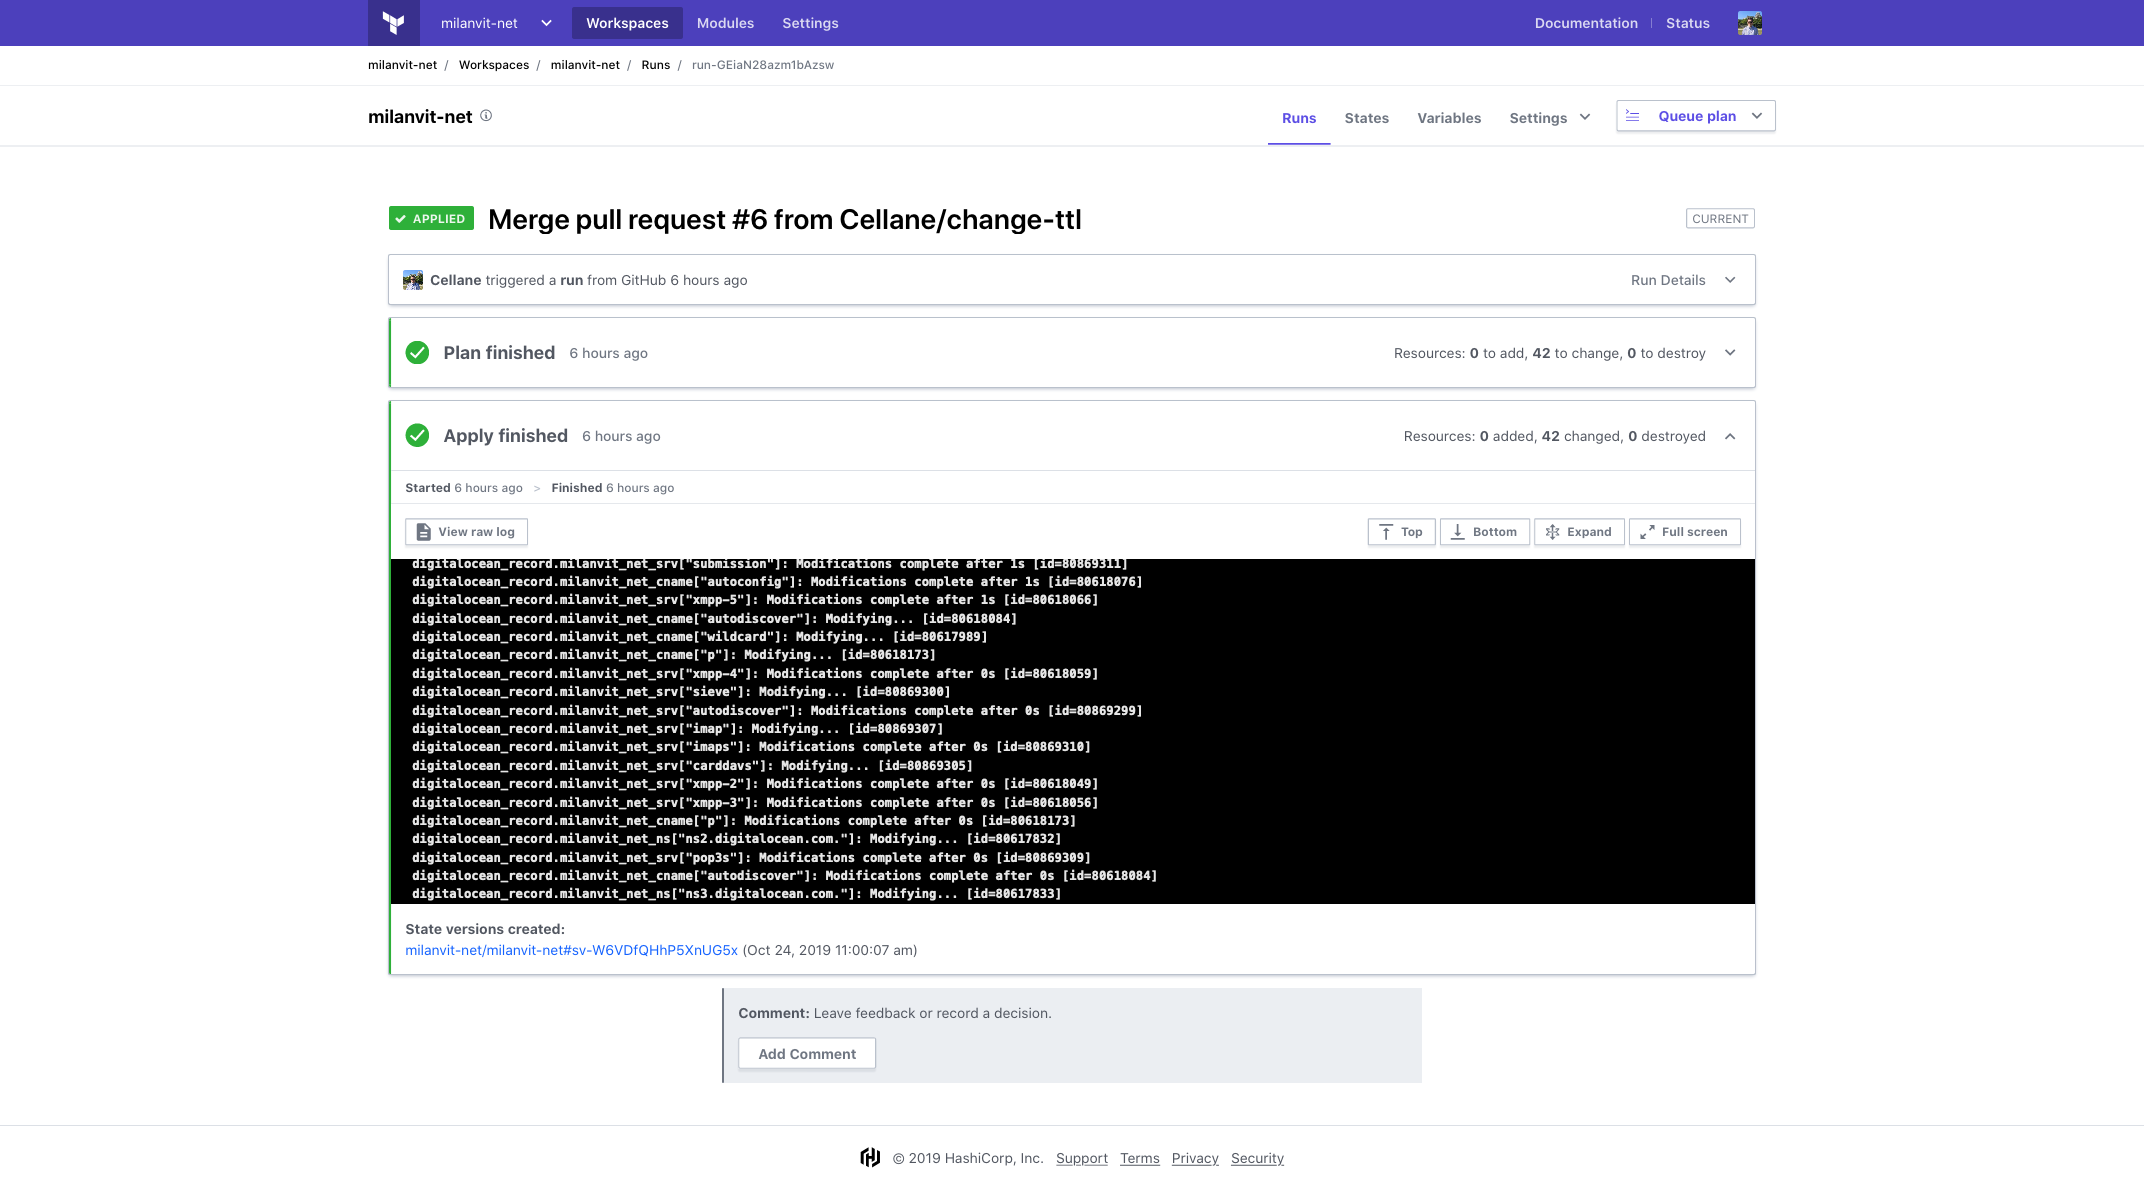
It works wonderfully, so I locked the master branch in the repository and now every change to infrastructure has to come through a pull request, and is applied automatically. Couldn’t be happier with it! 😍
Add more security to the mix 🔐
Just a small note before I move to the last, and perhaps the most awesome part. While certificate generations and renewals are super-easy in Dokku, appending a Strict Transport Security HTTP header automatically to every application is unfortunately not, at least not yet.
Well, worry not because this problem (quite literally) did not let me sleep until I wrote my first Dokku plugin that adds super-simple support for adding an HSTS header to Dokku. I think the documentation describes everything that you’d ever need to know.
All done, so why not self-host my e-mails? 📧
Seeing that the server could still perfectly handle the non-existent load and that Zoho, an e-mail service I previously heartily recommended, is unfortunately chronically incapable of detecting even the most obvious spam (despite my multiple complaints), I started looking into ways of self-hosting my own e-mail, as scary as that sounds.
Since the rest of the server leverages the power of Docker, I wanted the mail server to also run in Docker environment. Fortunately, there is a very convenient and quite user-friendly way of doing so, with a strange name of Mailcow 📧🐮
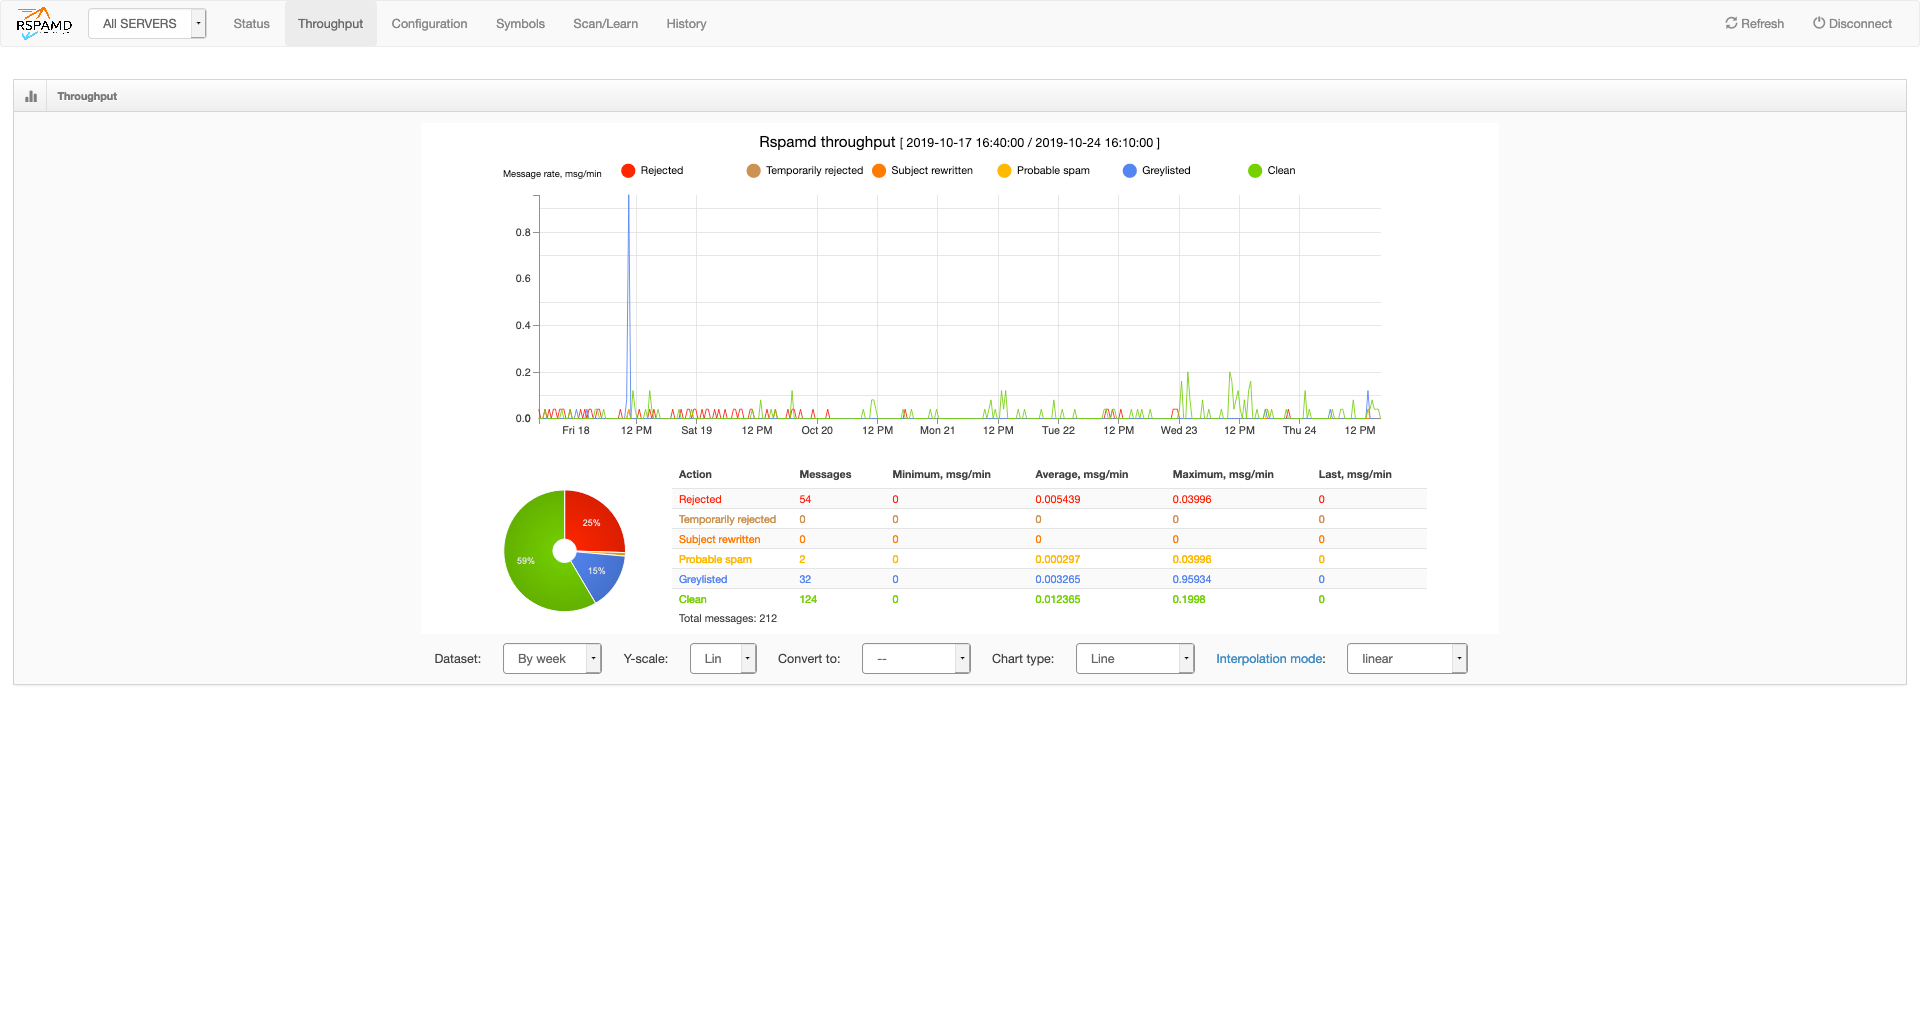
It comes with Dovecot for POP3 and IMAP, Postfix as a mail transfer agent, Rspamd for spam filtering, ClamAV for virus detection (disabled because I like to live dangerously – and without paying for more RAM), Solr for full-text search (disabled because RAM 😬), SOGo for webmail/calendar/address book, ACME for automatic certificate generation[5], admin panel for domain management and more. Mailcow supports everything you could possibly dream of: DKIM, blacklists and whitelists, temporary mailboxes, ActiveSync, imapsync to migrate your old e-mails in a matter of minutes, quarantine, two-factor authentication (unfortunately only for admin panel for now) and so much more – that’s what I call “batteries included” 🔋

Mailcow doesn’t use a deployment method that I’d particularly approve of (a simple docker-compose up -d spins all the required containers), but I have to admit, it works like a charm. If you follow the installation instructions, I’m sure you can finish the basic setup in less than five minutes.
Since I wanted all traffic to go through Dokku’s Nginx first and only route the mail.milanvit.net and webmail.milanvit.net to Mailcow, I also had to follow this tutorial to adjust my Nginx configuration, and install a local Certbot to obtain certificates for these two subdomains and pass them to Dokku’s Nginx (easy) as well as Mailcow’s Nginx, Dovecot and Postfix (via Certbot’s post-hook script).
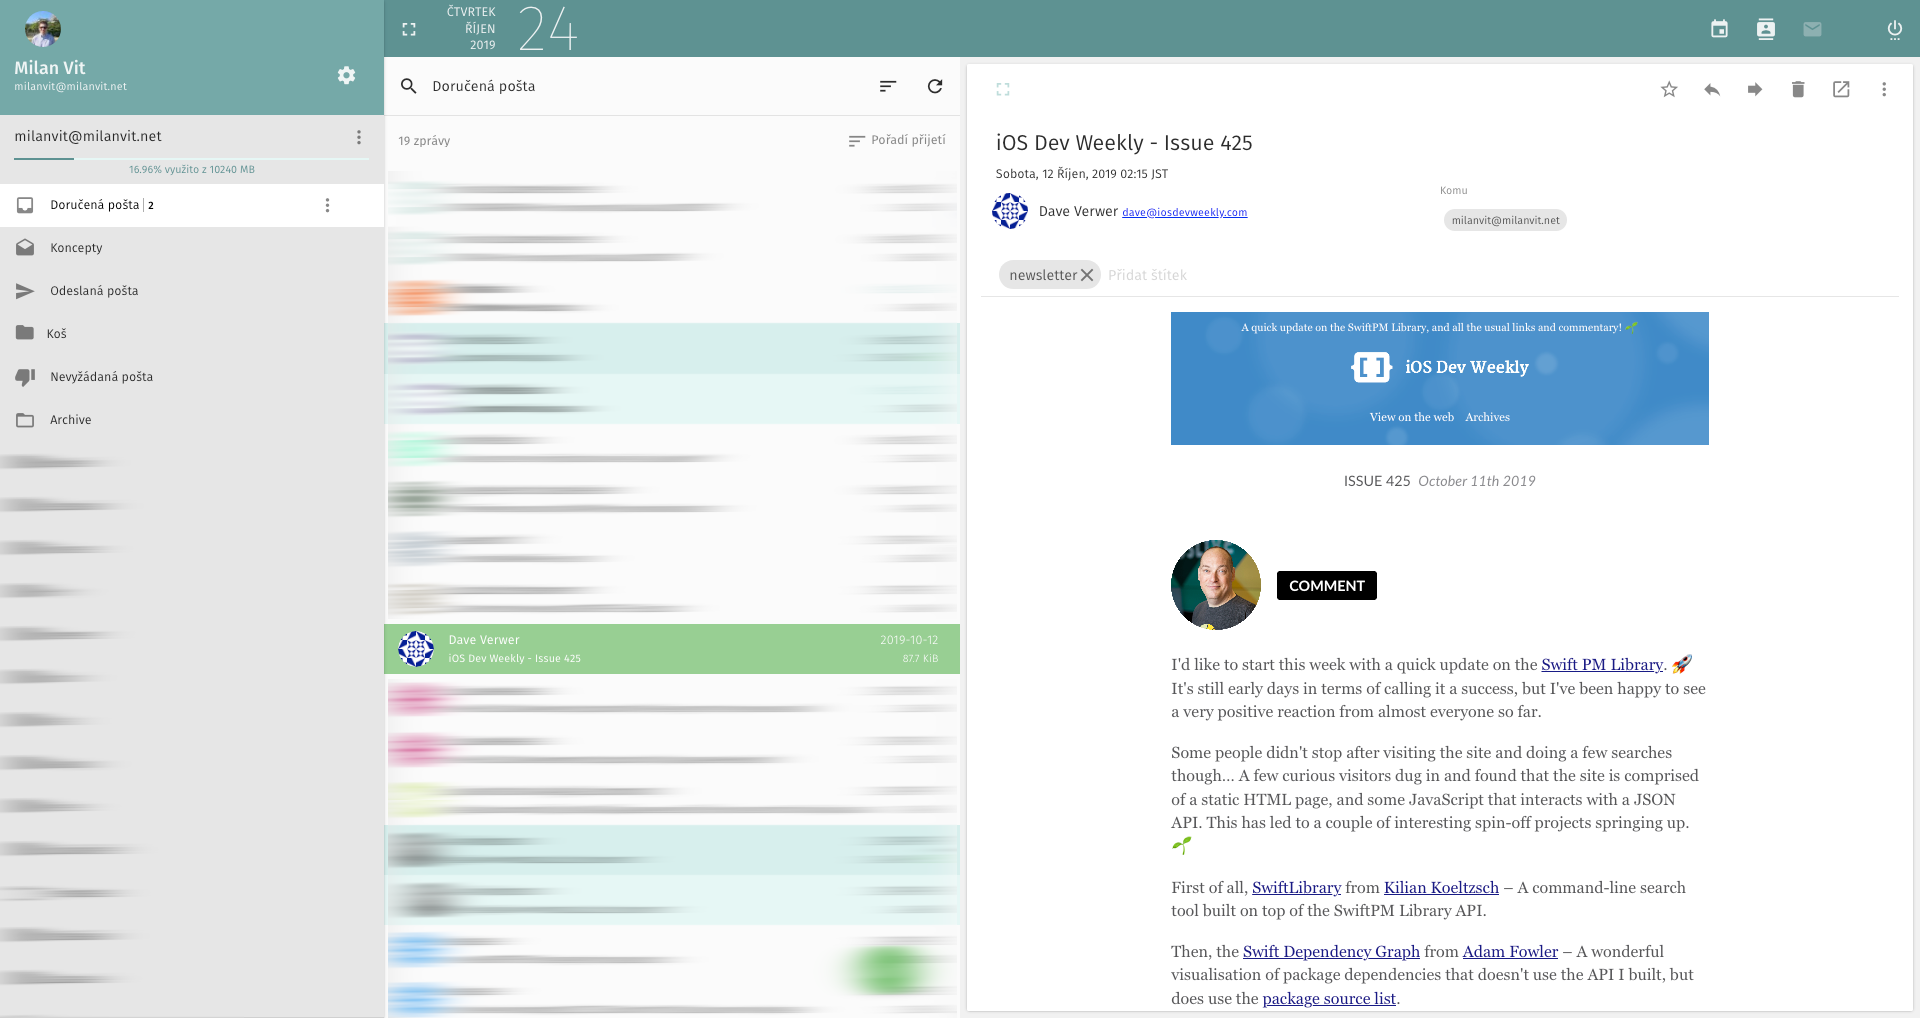
When that was done, I headed to my brand new mail admin panel, added a milanvit.net domain, created mailboxes & users, set up sync jobs to migrate all my old e-mails from Zoho to this brand new server, created a DKIM record and changed Rspamd’s admin panel password[6]. Then I logged in as a regular user to SOGo webmail and manually migrated all my e-mail filters while watching 16000+ messages quickly appearing in my mailbox.
Setting up the e-mail client and calendar & address book synchronization couldn’t be easier, either. For iOS, Mailcow offers ActiveSync emulation (so that e-mails can be pushed, rather than pulled), and for macOS, it’s somehow even easier – I didn’t need to configure anything manually, I just logged to the mail admin panel not as an administrator user but rather as the mailbox user (that also allows you to create temporary mailboxes and adjust spam filter sensitivity), navigated to mail.milanvit.net/mobileconfig.php which generated a configuration profile, and imported this profile in macOS. That’s seriously it!
The only thing left to do was finalize the migration by adjusting the DNS records – and that’s now a matter of a simple pull request now that the DNS is under Terraform management, right? 😀 (You can see in the PR that I had to, unfortunately, change the Droplet’s name to mail.milanvit.net in order for Digital Ocean to update the PTR record. Oh well 🤷♂️)
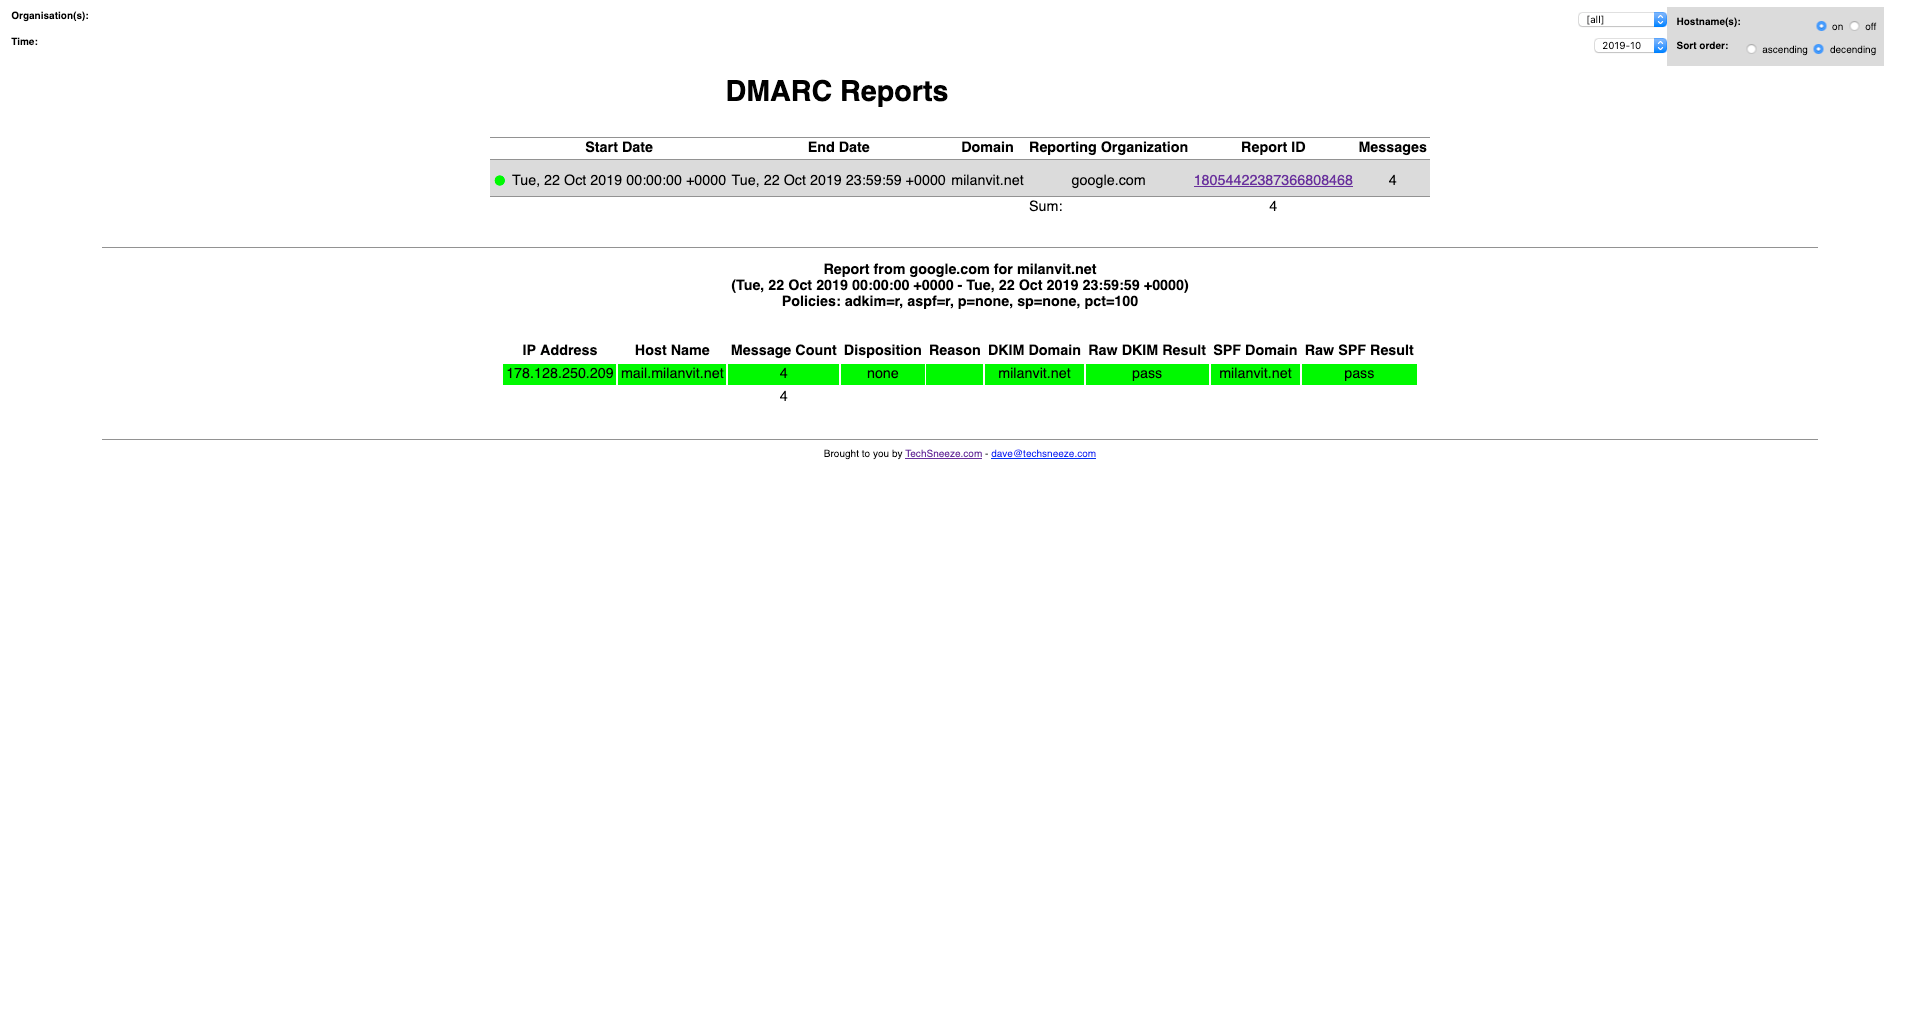
Analyzing DMARC reports 📝
Finally, I wanted to do one last (is it really last❓) thing (OK, maybe for now at least 🤣): while my domain had a DMARC DNS record for as long as I can remember, I’ve never actually read or analyzed these reports, which just feels like a wasted opportunity. After finding a DMARC Report Parser and DMARC Report Viewer, and in particular, a Dockerized version of them both, I changed the mail address to which the automatic reports are sent to a new mailbox and within minutes, I Dokku-ized the Dockerized version (create app, provision MySQL database, link the database, configure environmental variables – you know the drill by now 👷♂️) and voilà, DMARC Analyzer is alive and well 🎉 I might secure it in the future with Dokku’s Basic Auth plug-in, but for now, I don’t think it exposes anything sensitive.
Overall, I couldn’t be happier with the setup. Or rather – I probably could, but at this moment, I can’t imagine how 🤣 Everything is running in separate Docker container(s) 🐳, anything that reasonably could be automated was automated 🔧, and the whole process of discovery and setting things up was a ton of fun. If you’re thinking of doing something similar with your server, I can’t but recommend it!
Needless to say, with the insane amount of traffic my site was getting, the CPU usage rarely ever touched 10%.
In fact, Monstar Lab uses Dokku for setting up dev & staging environments for a few projects. It just made sense.
You can see the credentials Dokku generated for you by running the
dokku mysql:info blog-dbcommand.To be more precise, I pointed the
Arecord formilanvit.netto the IP address of the Droplet, andCNAMErecord for*tomilanvit.net. This way, Dokku can serve any number of subdomains/applications.Which I had to disable, since Mailcow is not the only thing running on the server, and instead is hidden behind Dokku’s Nginx. Therefore, I configured Dokku’s Nginx to route requests for Mailcow to Mailcow’s Nginx, and generate & renew SSL certificates for Mailcow’s subdomains using a locally installed Certbot – these certificates are then used both by Dokku’s Nginx (required to successfully proxy pass the request) and Mailcow’s Nginx & Postfix & Dovecot.
I perhaps spend way too much time watching Rspamd’s admin panel, but I just can’t help but be amazed how precise the spam detection is – it really makes me wonder how could Zoho get spam detection so, oh so wrong 🤦♂️