Ever since I bought the Das Keyboard last year, I knew that mechanical keyboards are much more comfortable than any keyboard Apple has offered in the past 16 years – at the very least, you don’t have to deal with the absolute disaster known as Butterfly Mechanism.
Ever since I bought the Das Keyboard last year, I knew that mechanical keyboards are, at least for me personally, much more comfortable than any keyboard Apple has offered in the past 16 years – at the very least, you don’t have to deal with the absolute disaster known as Butterfly Mechanism, and are not limited to the total failure of an arrow key layout presented in the recent MacBook Pros.
But it was only recently that I became aware of three facts:
There is a rather large community of mechanical keyboard enthusiasts.
When it comes to keyboards, you are absolutely not limited to what regular stores offer – pretty much anything you build yourself will likely be better.
Apparently, Das Keyboard is trash and Cherry MX Browns are terrible.
So with the newly acquired knowledge, I present you a gallery of how I built my own mechanical keyboard.
Ah, but before going into that, here’s an obligatory parts list:
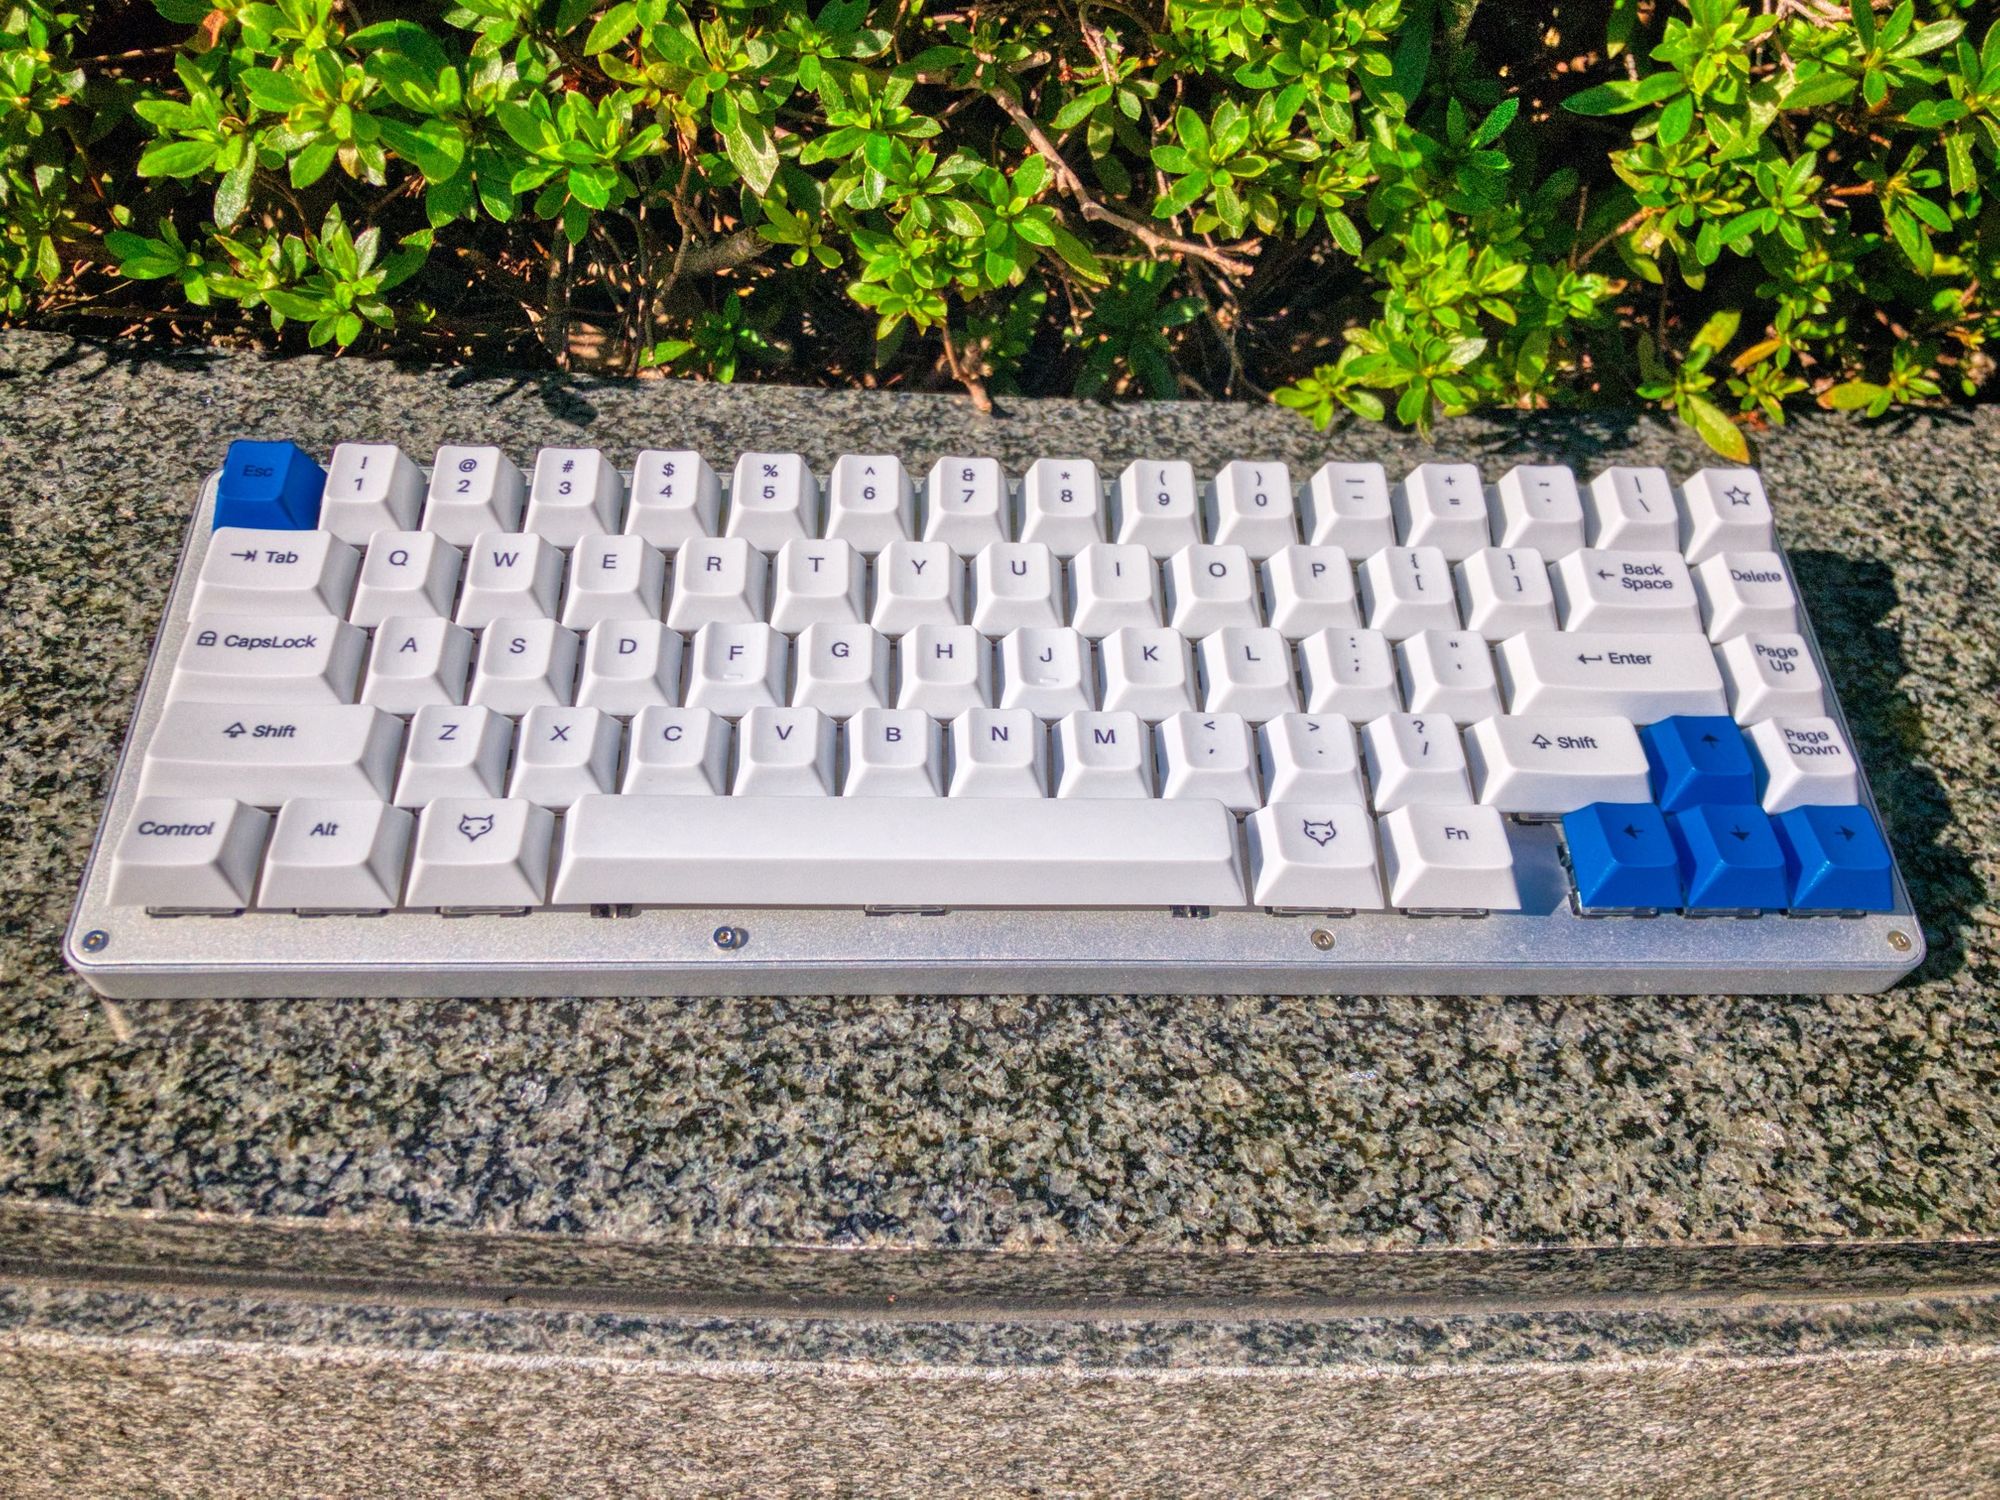
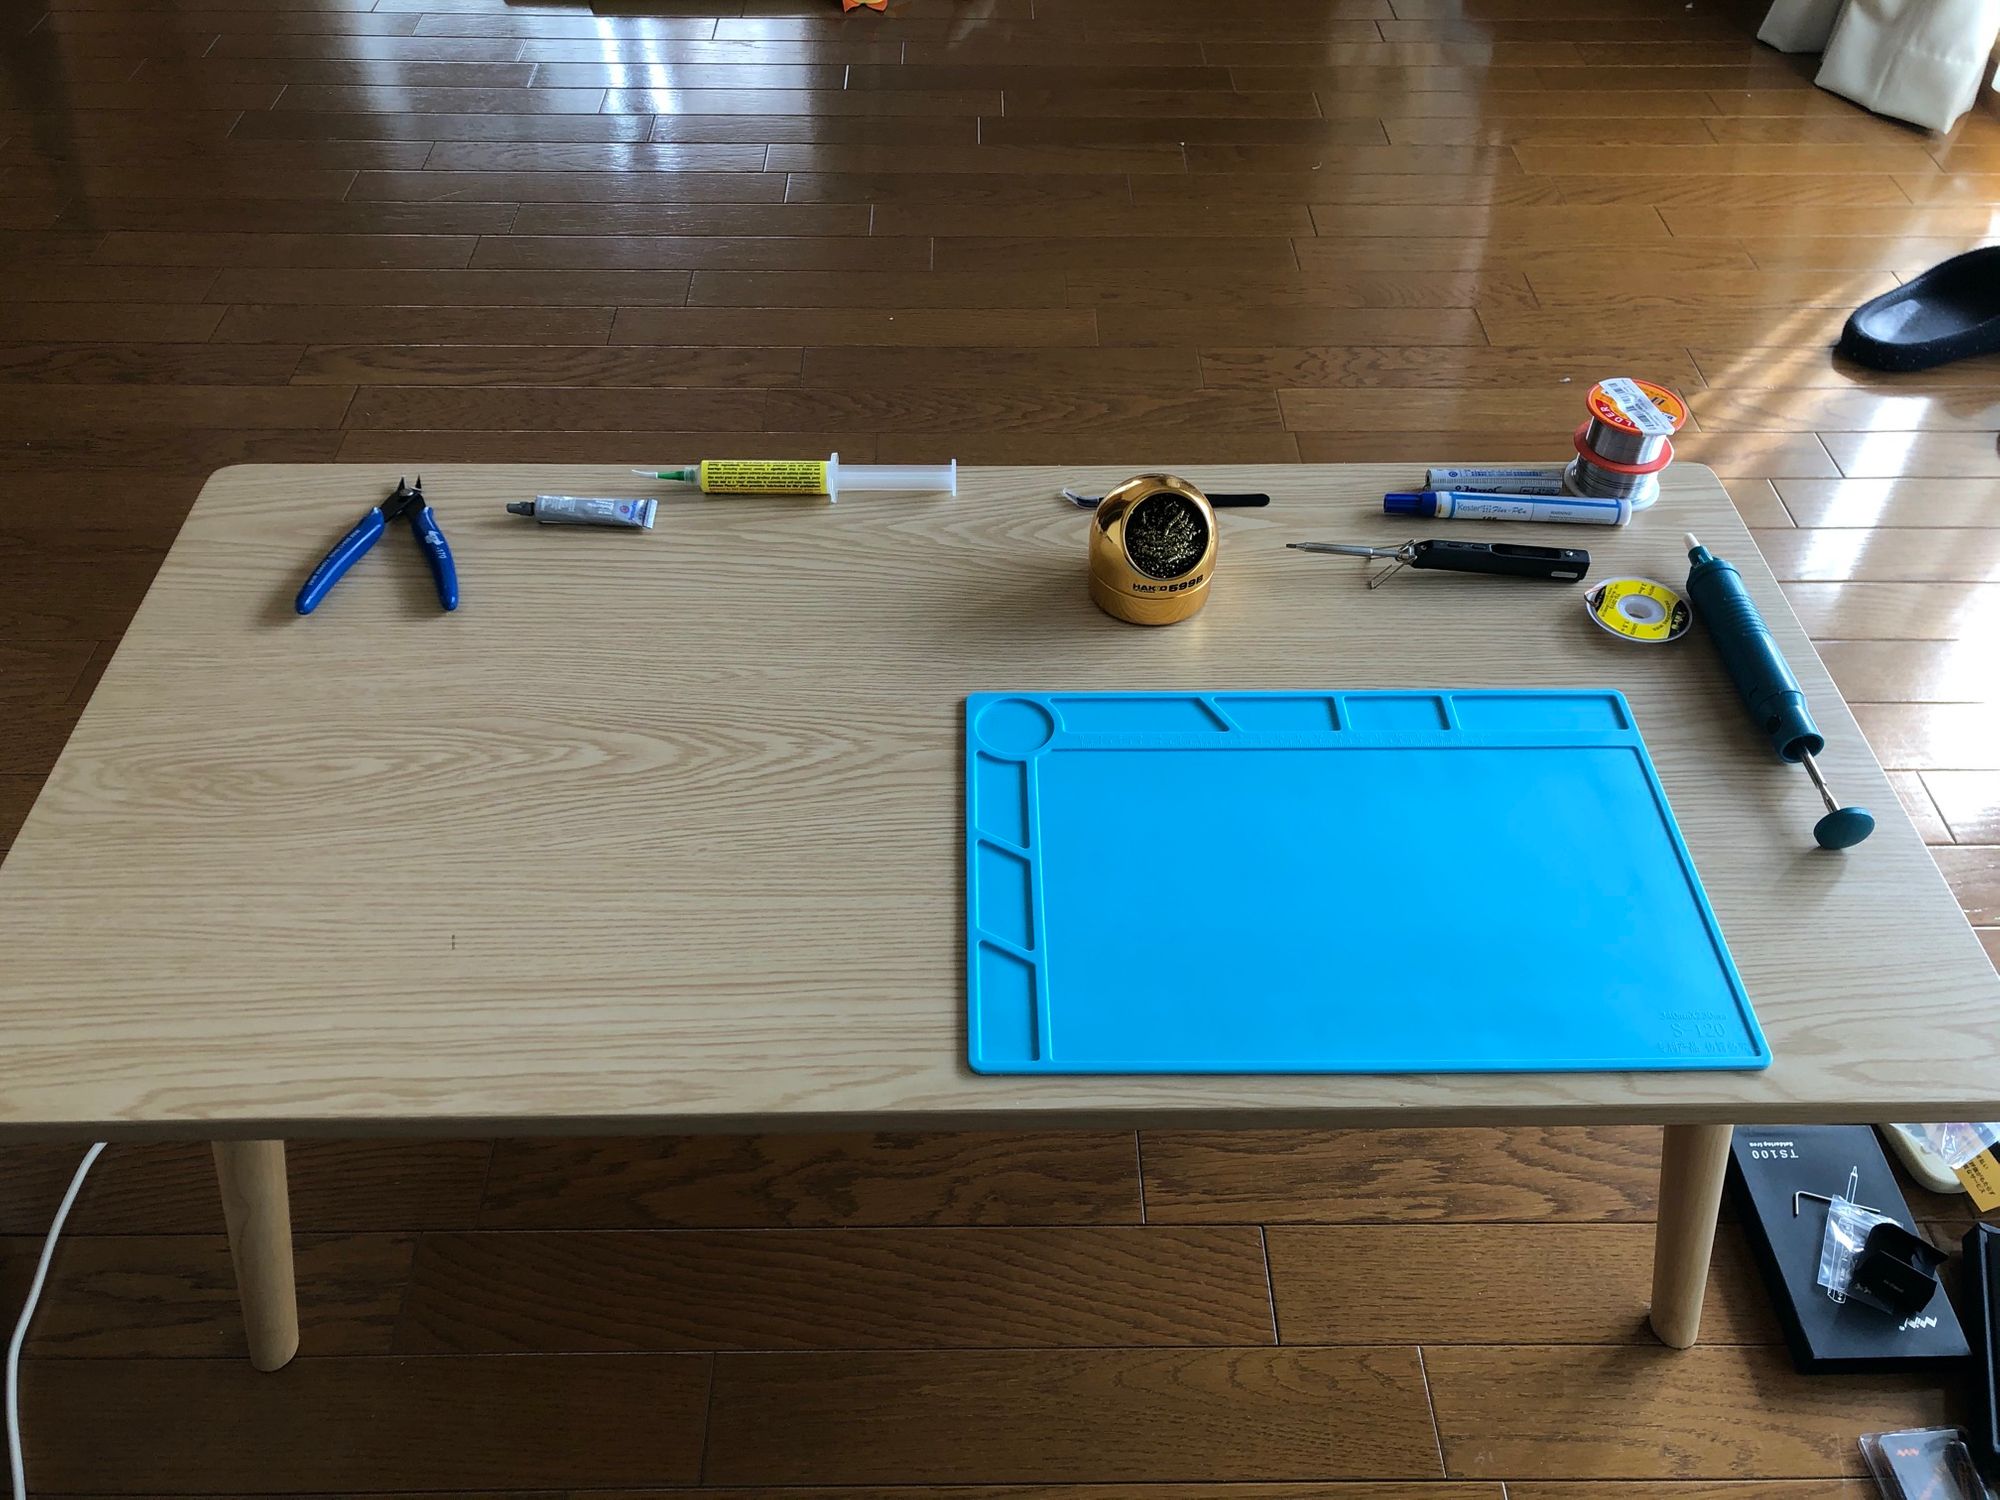
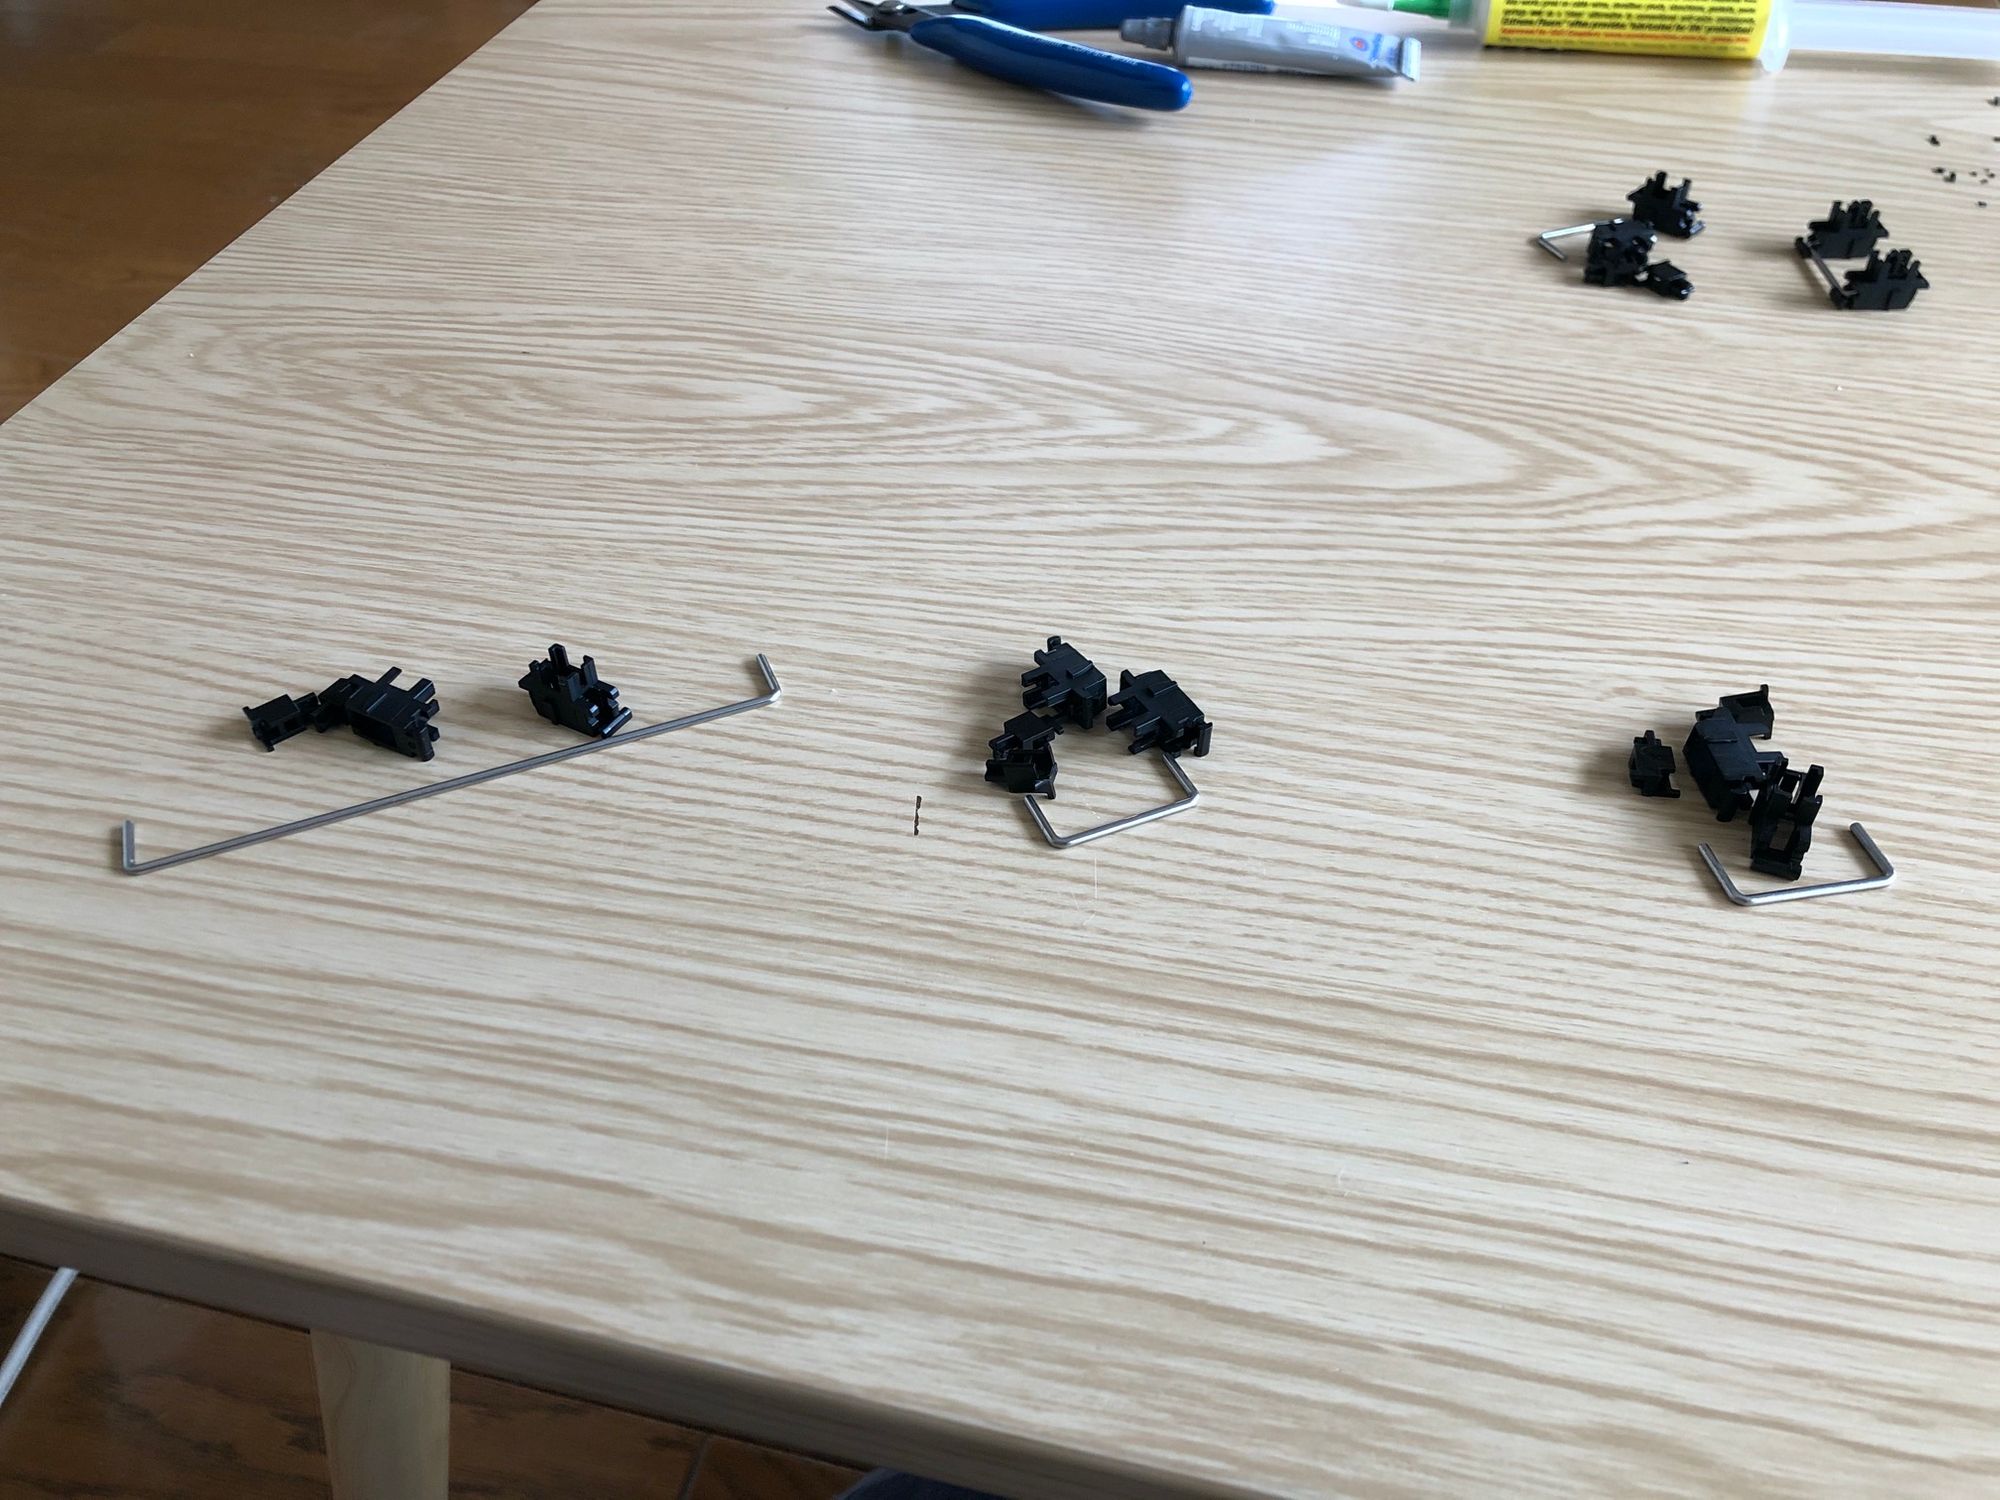
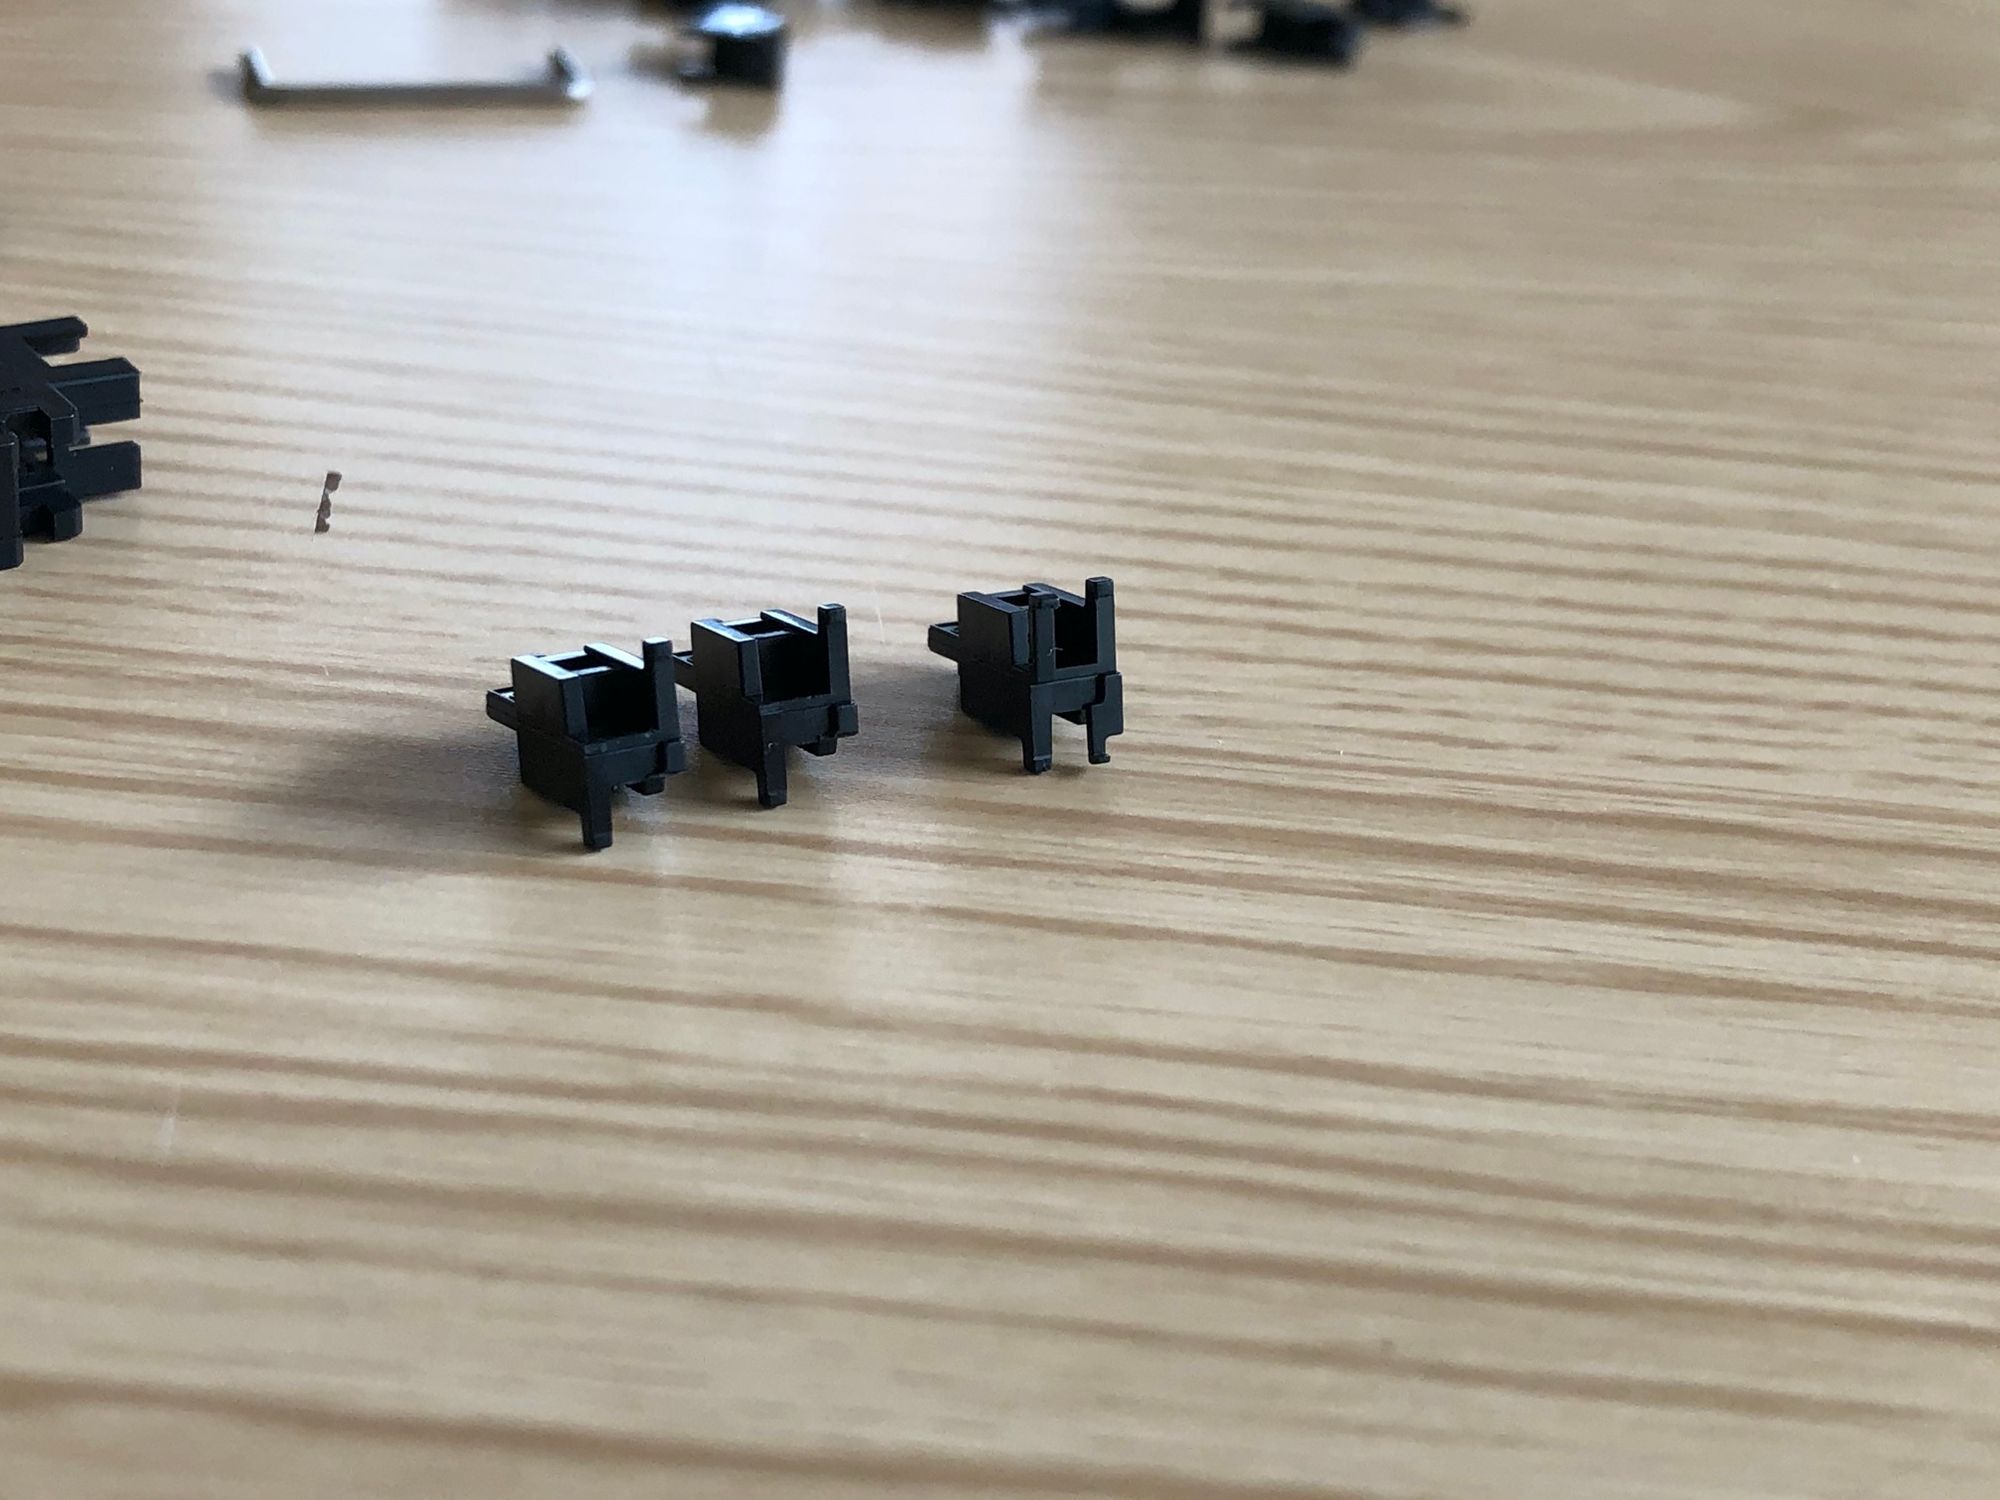
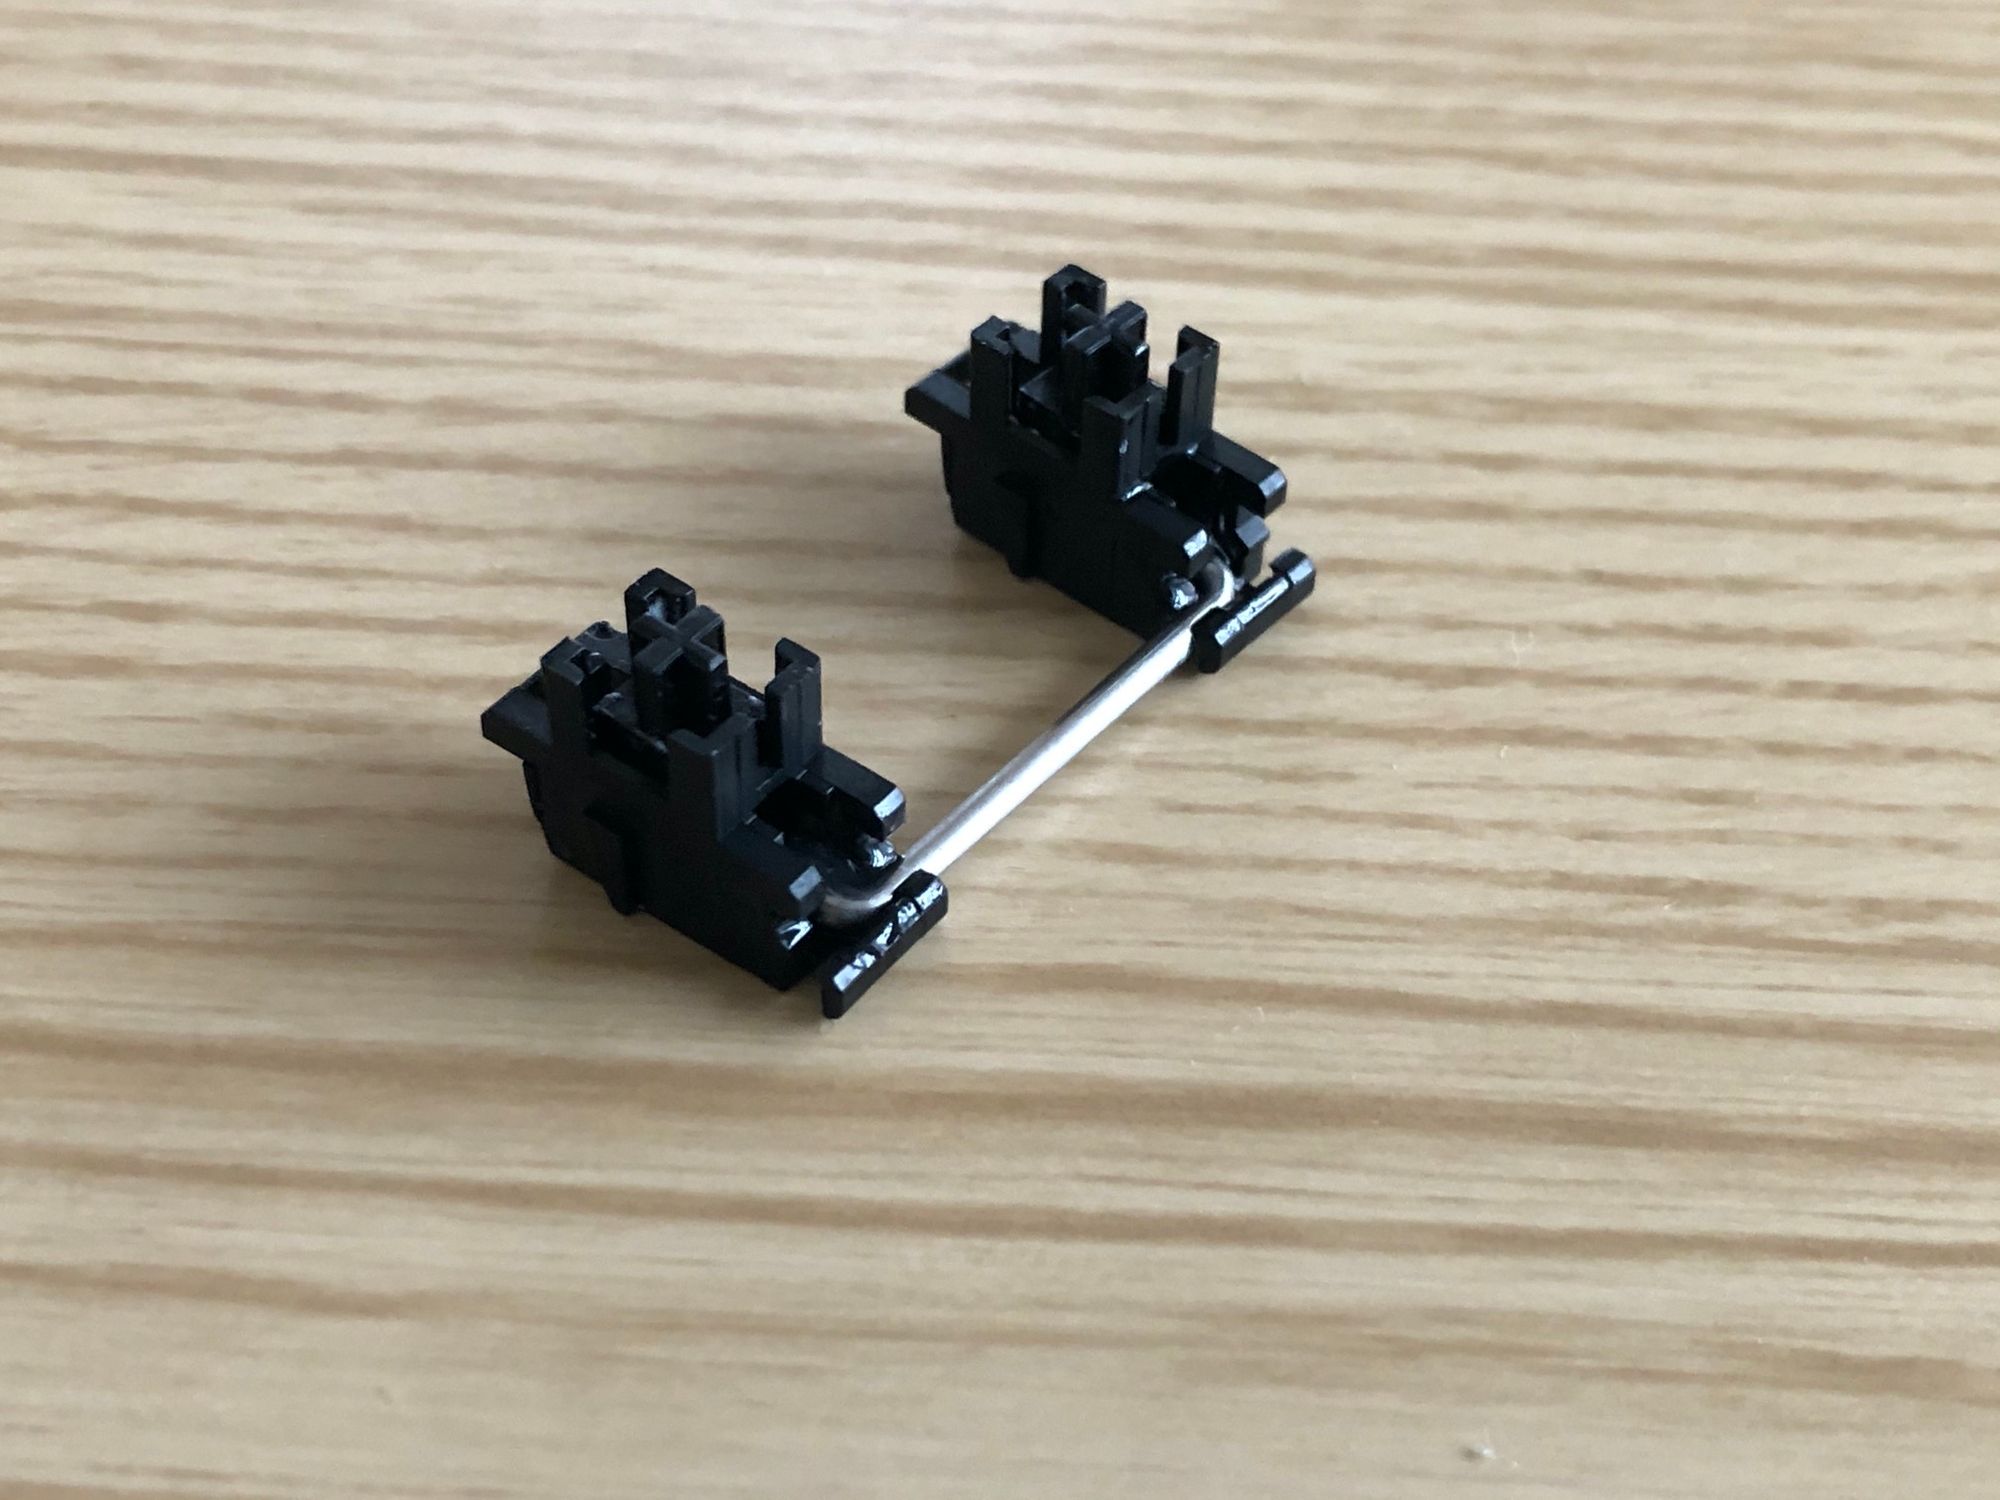
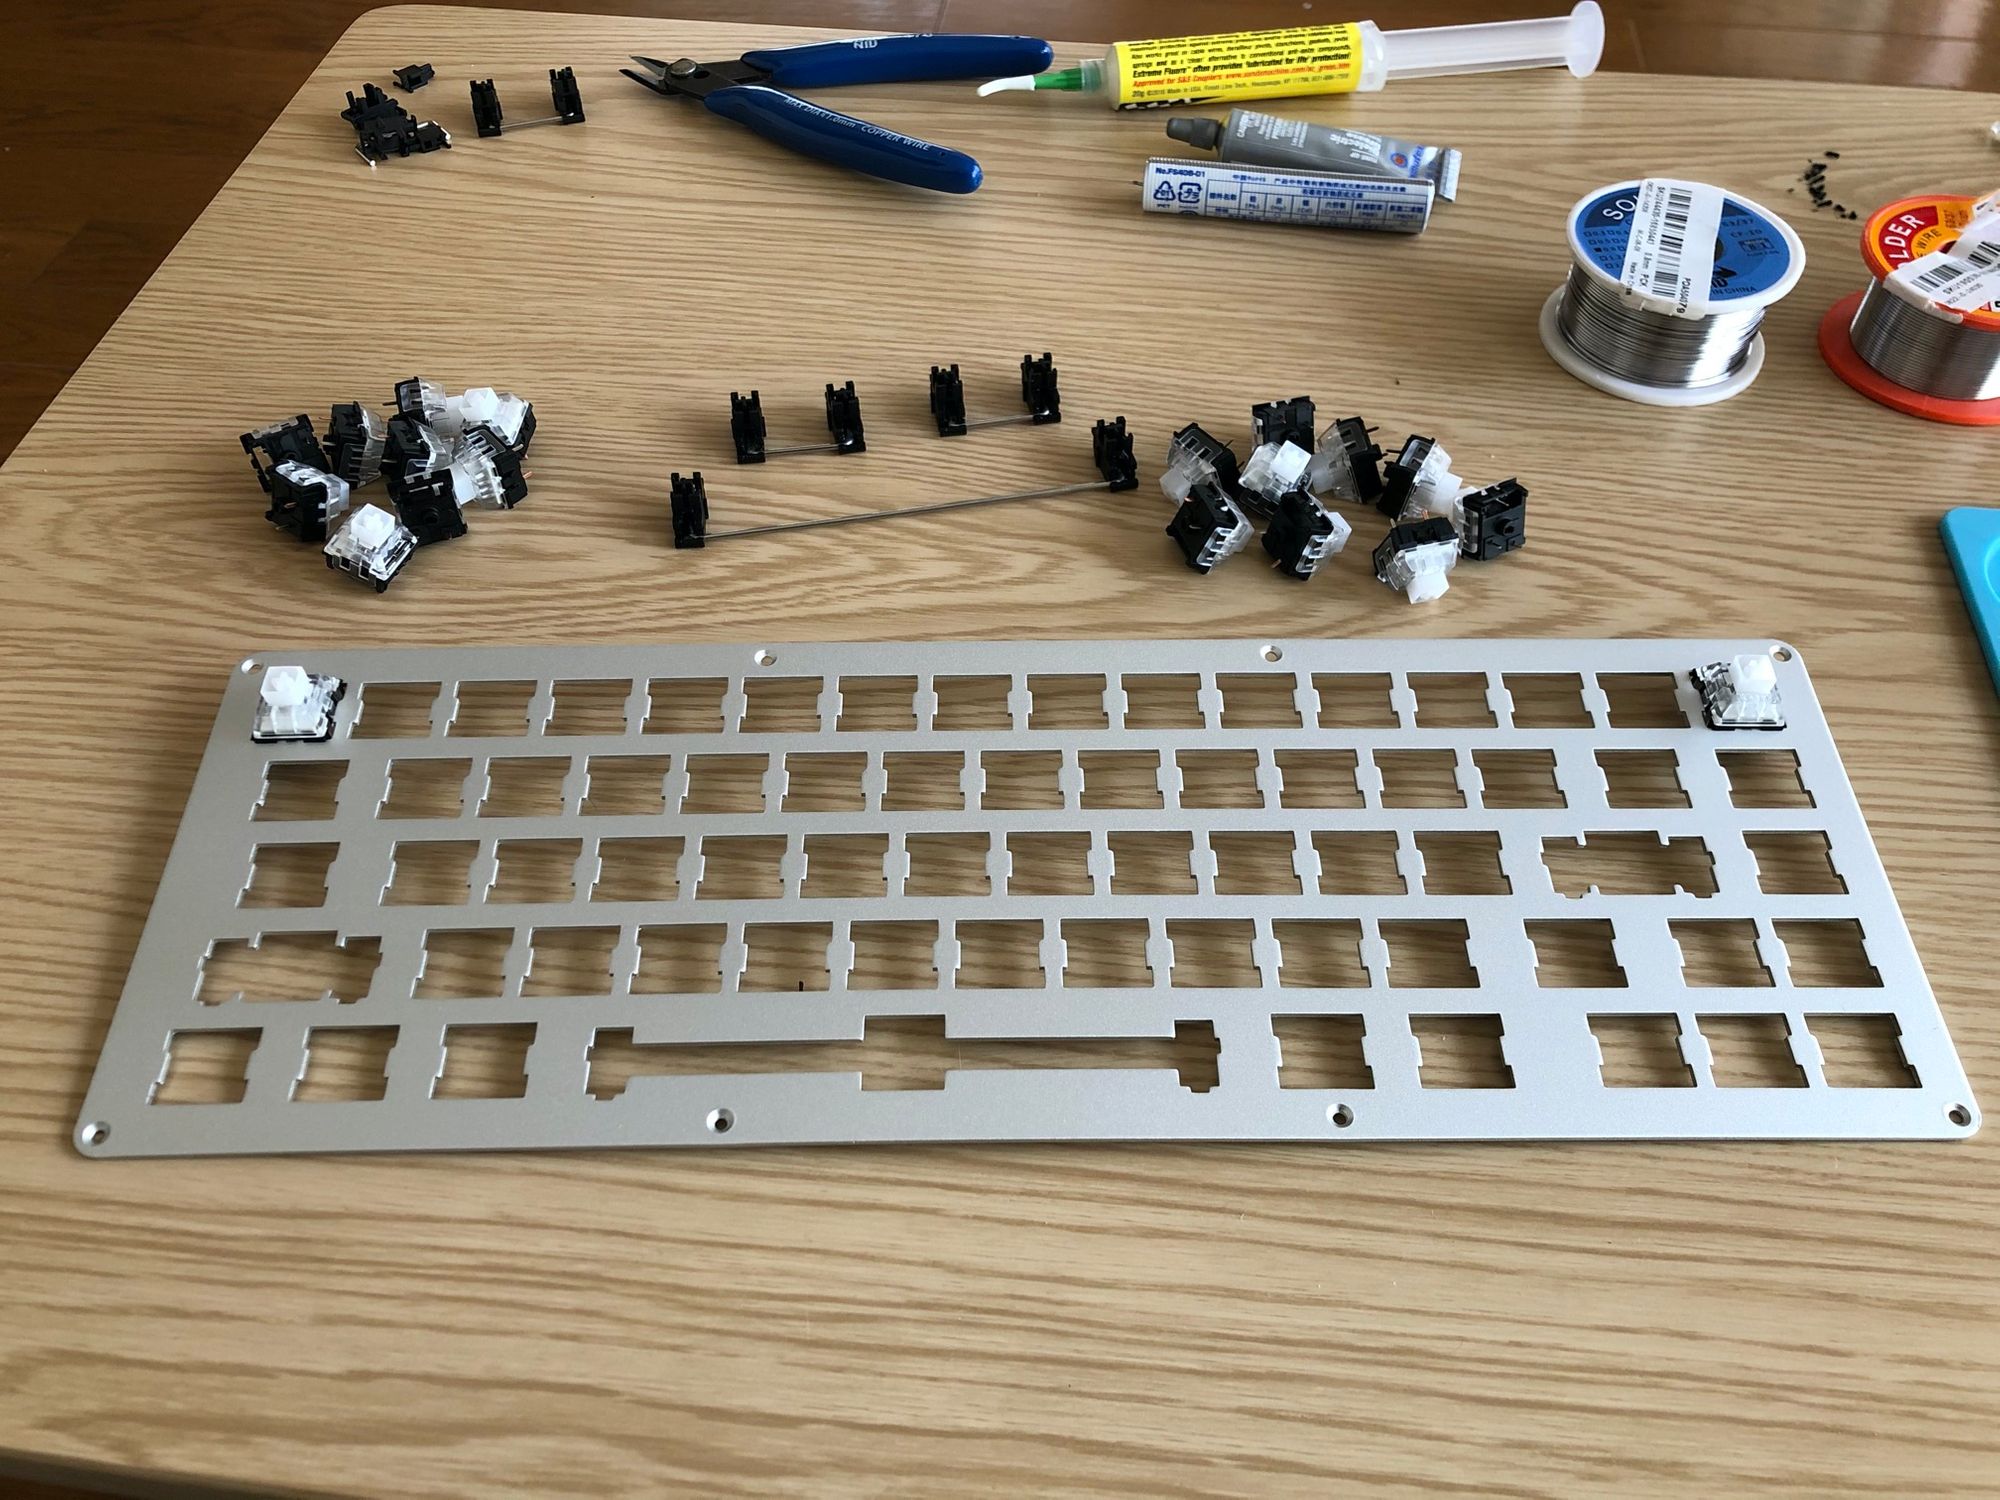
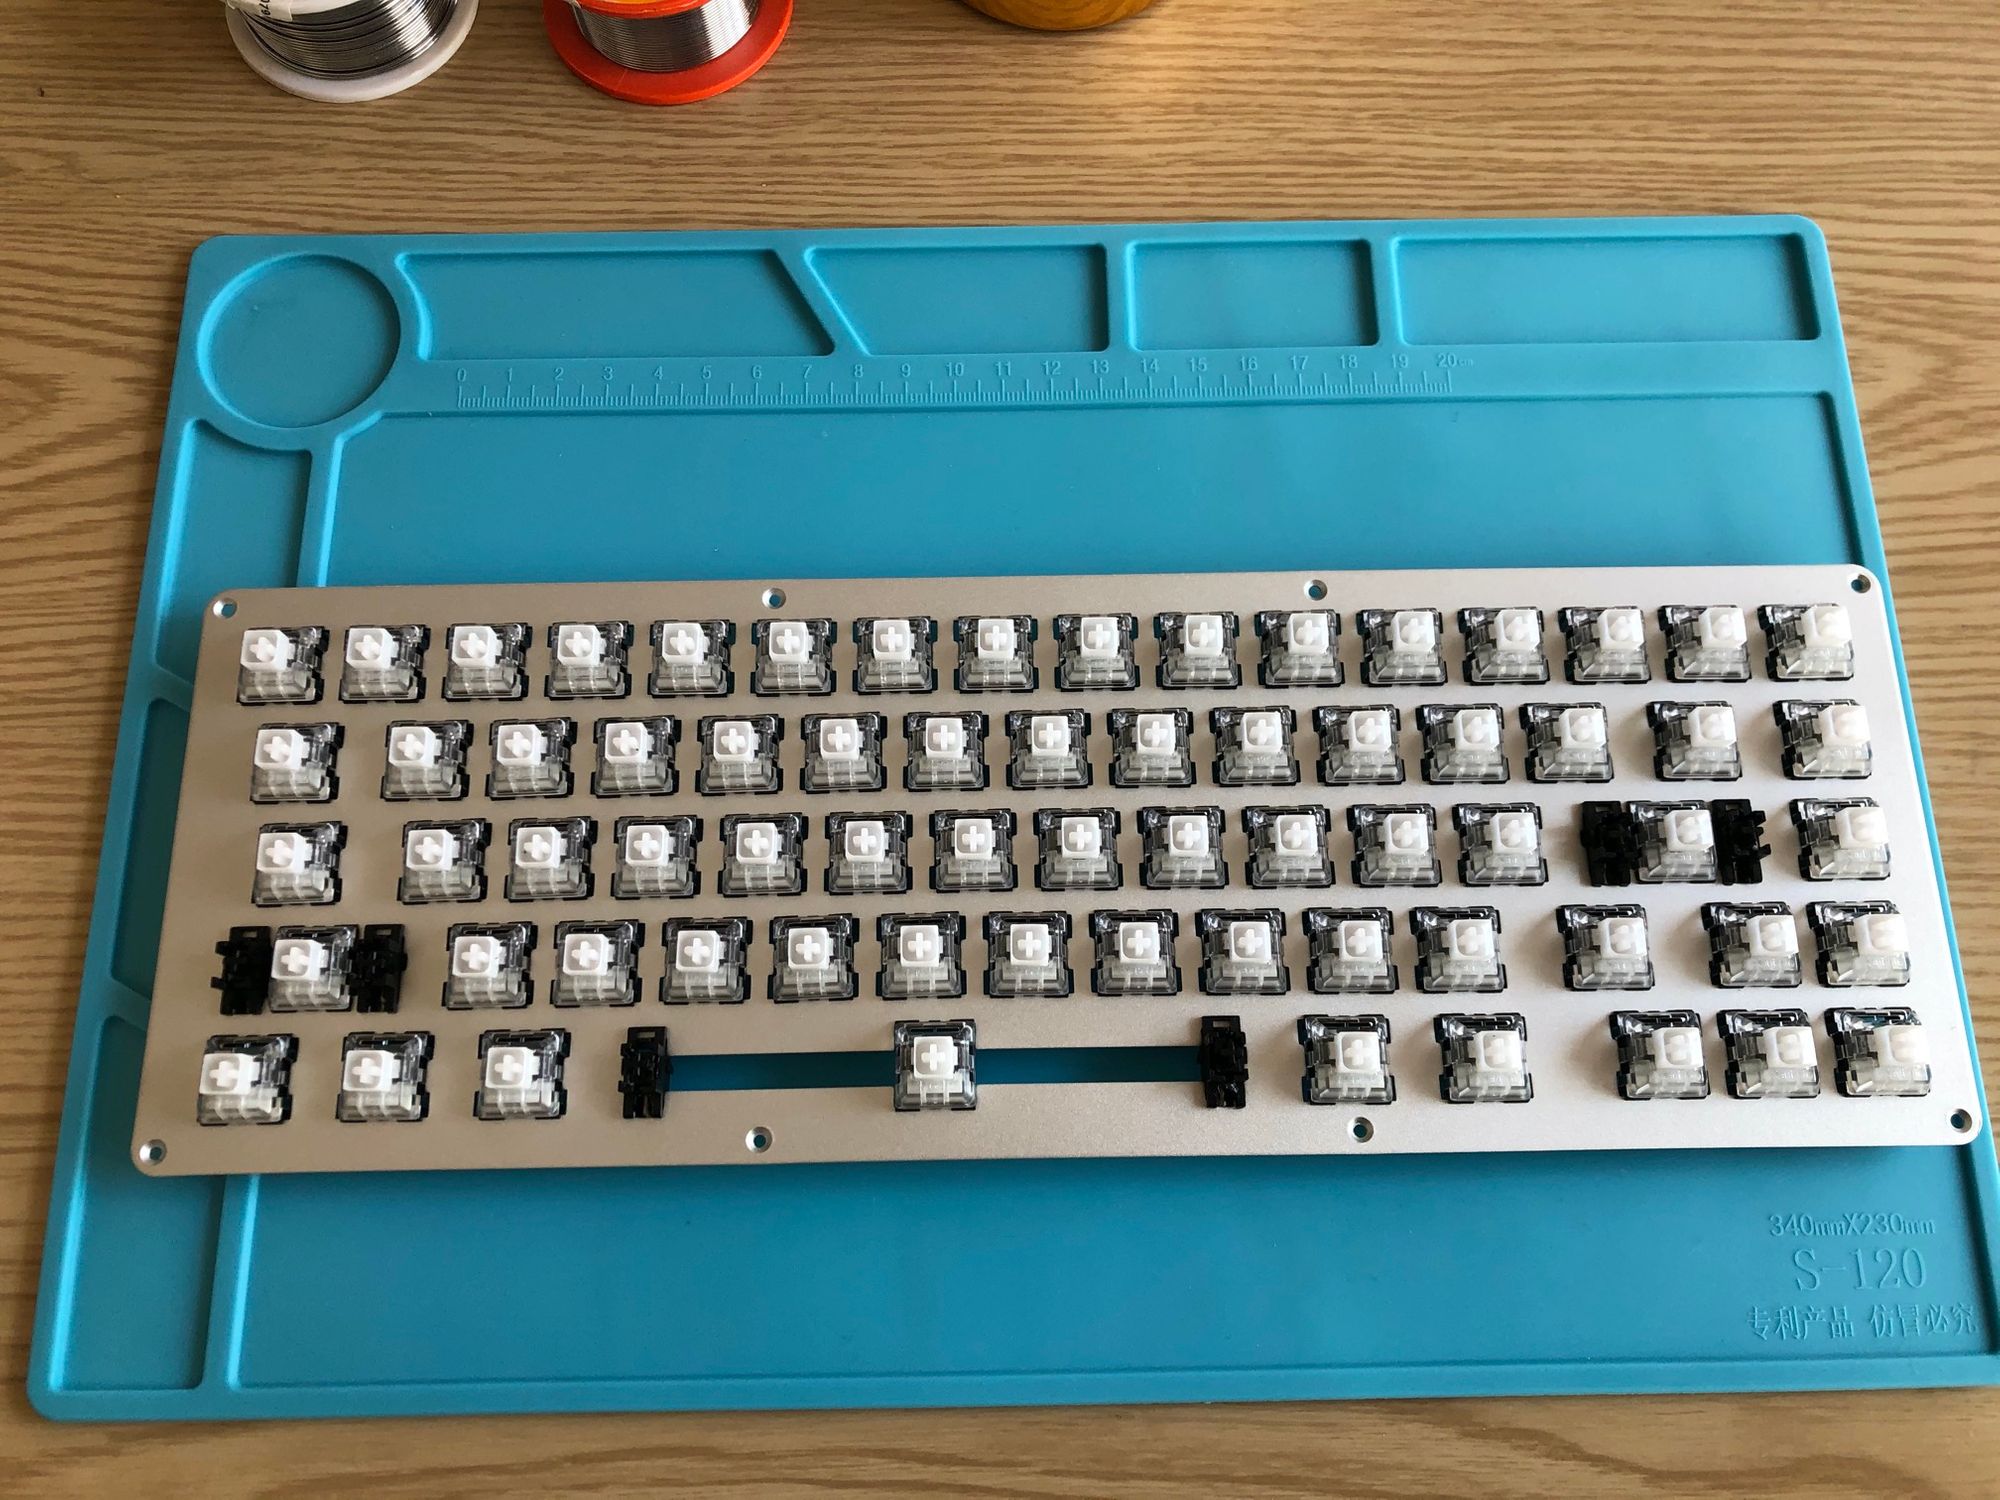
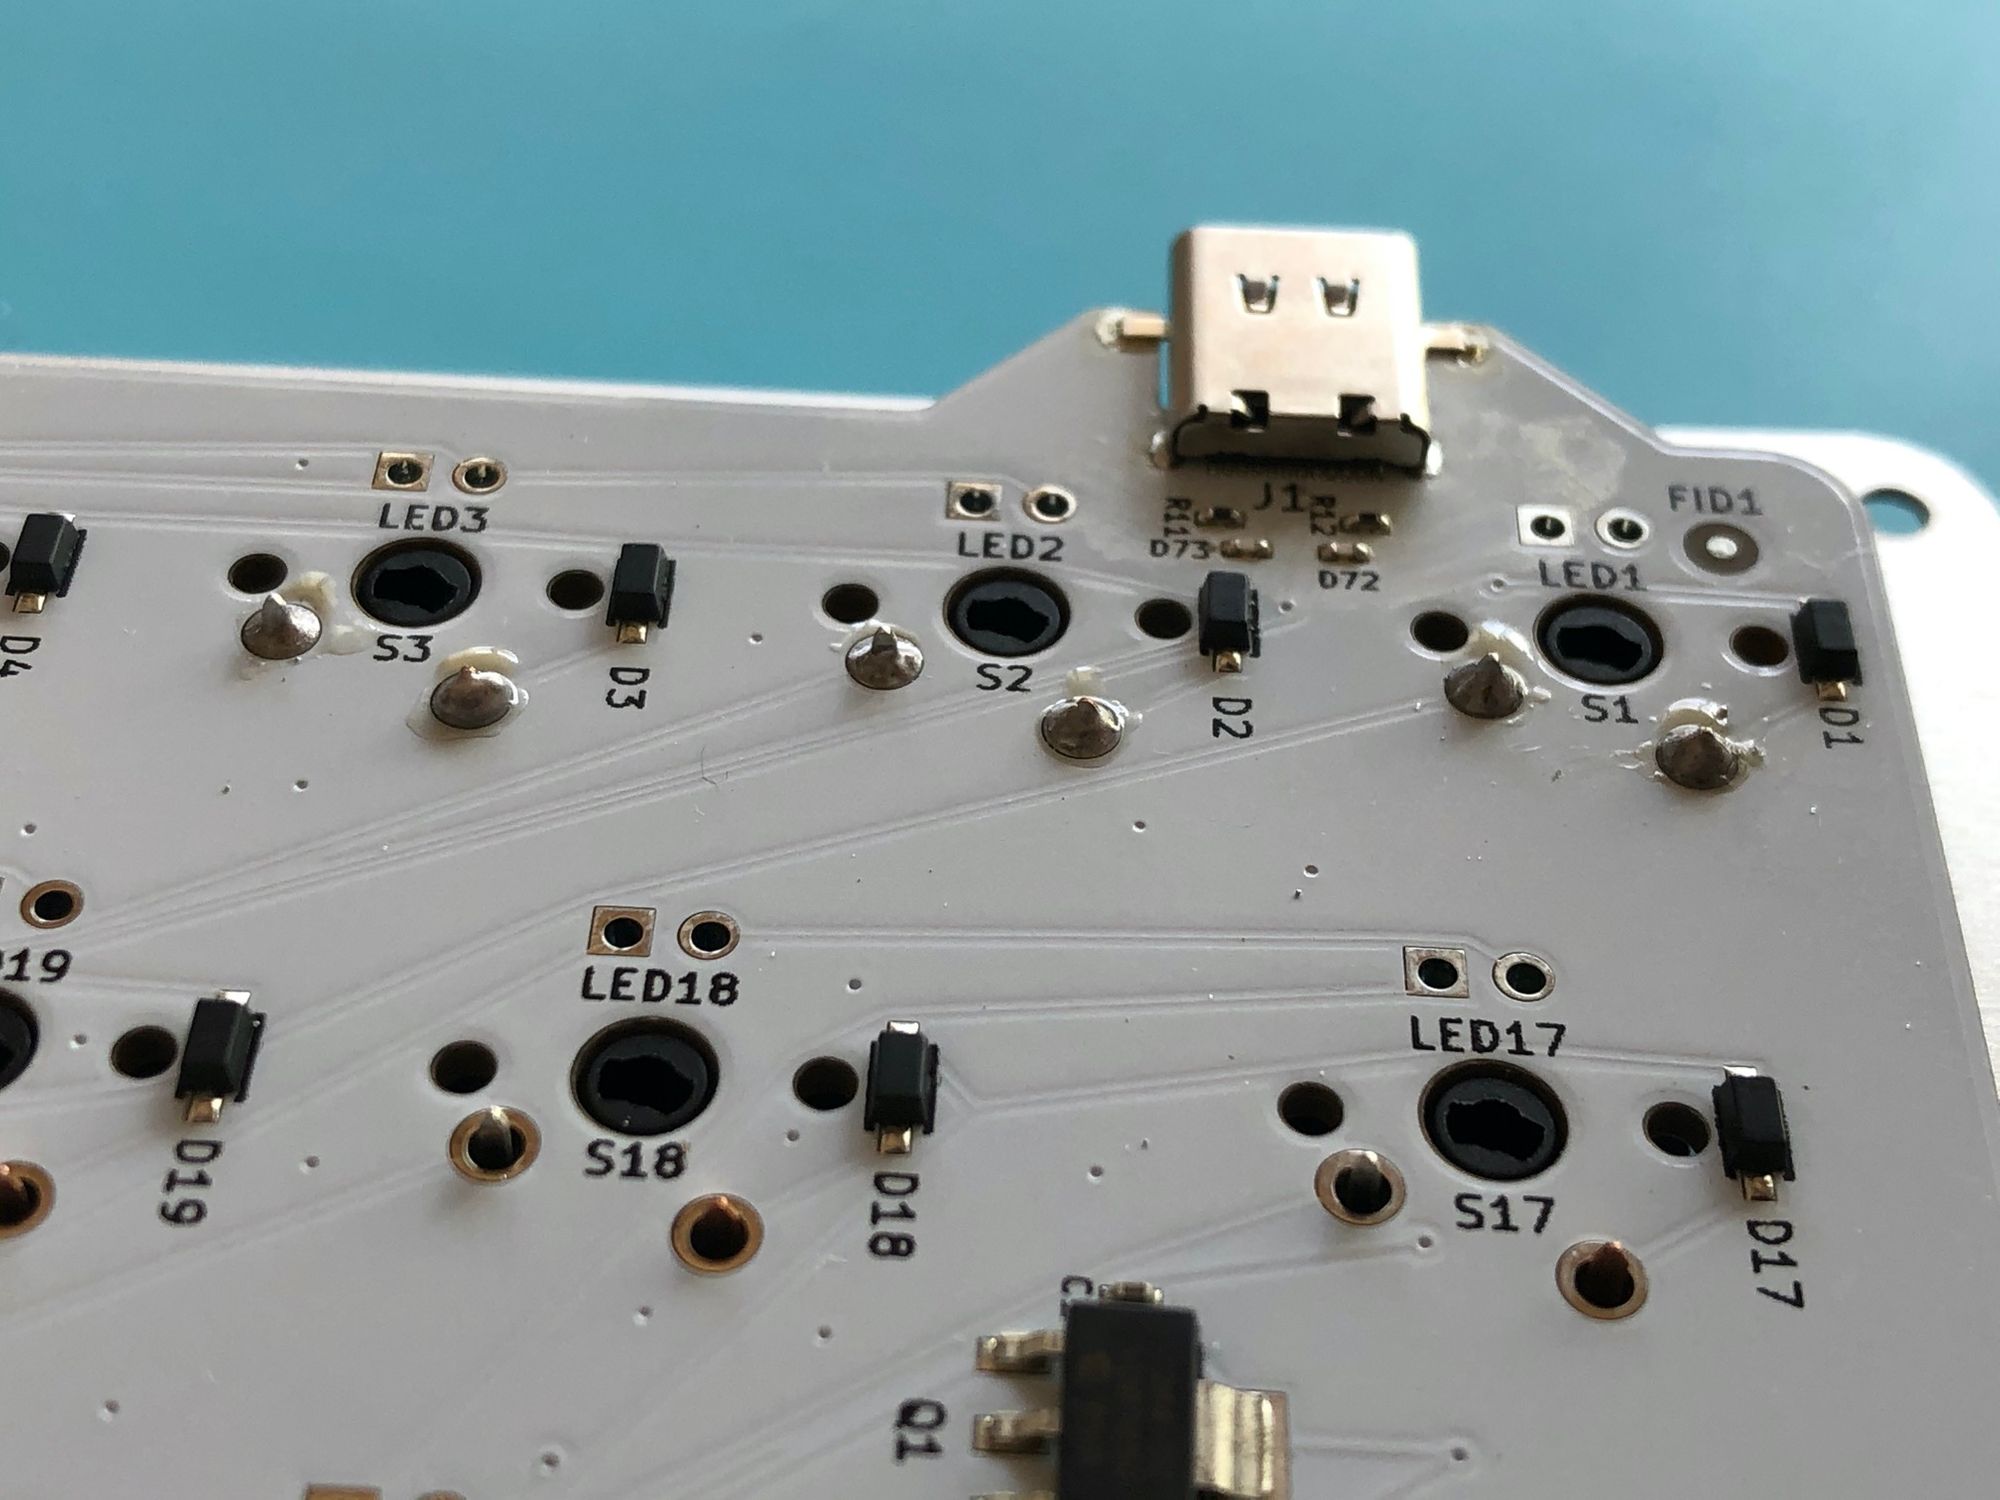
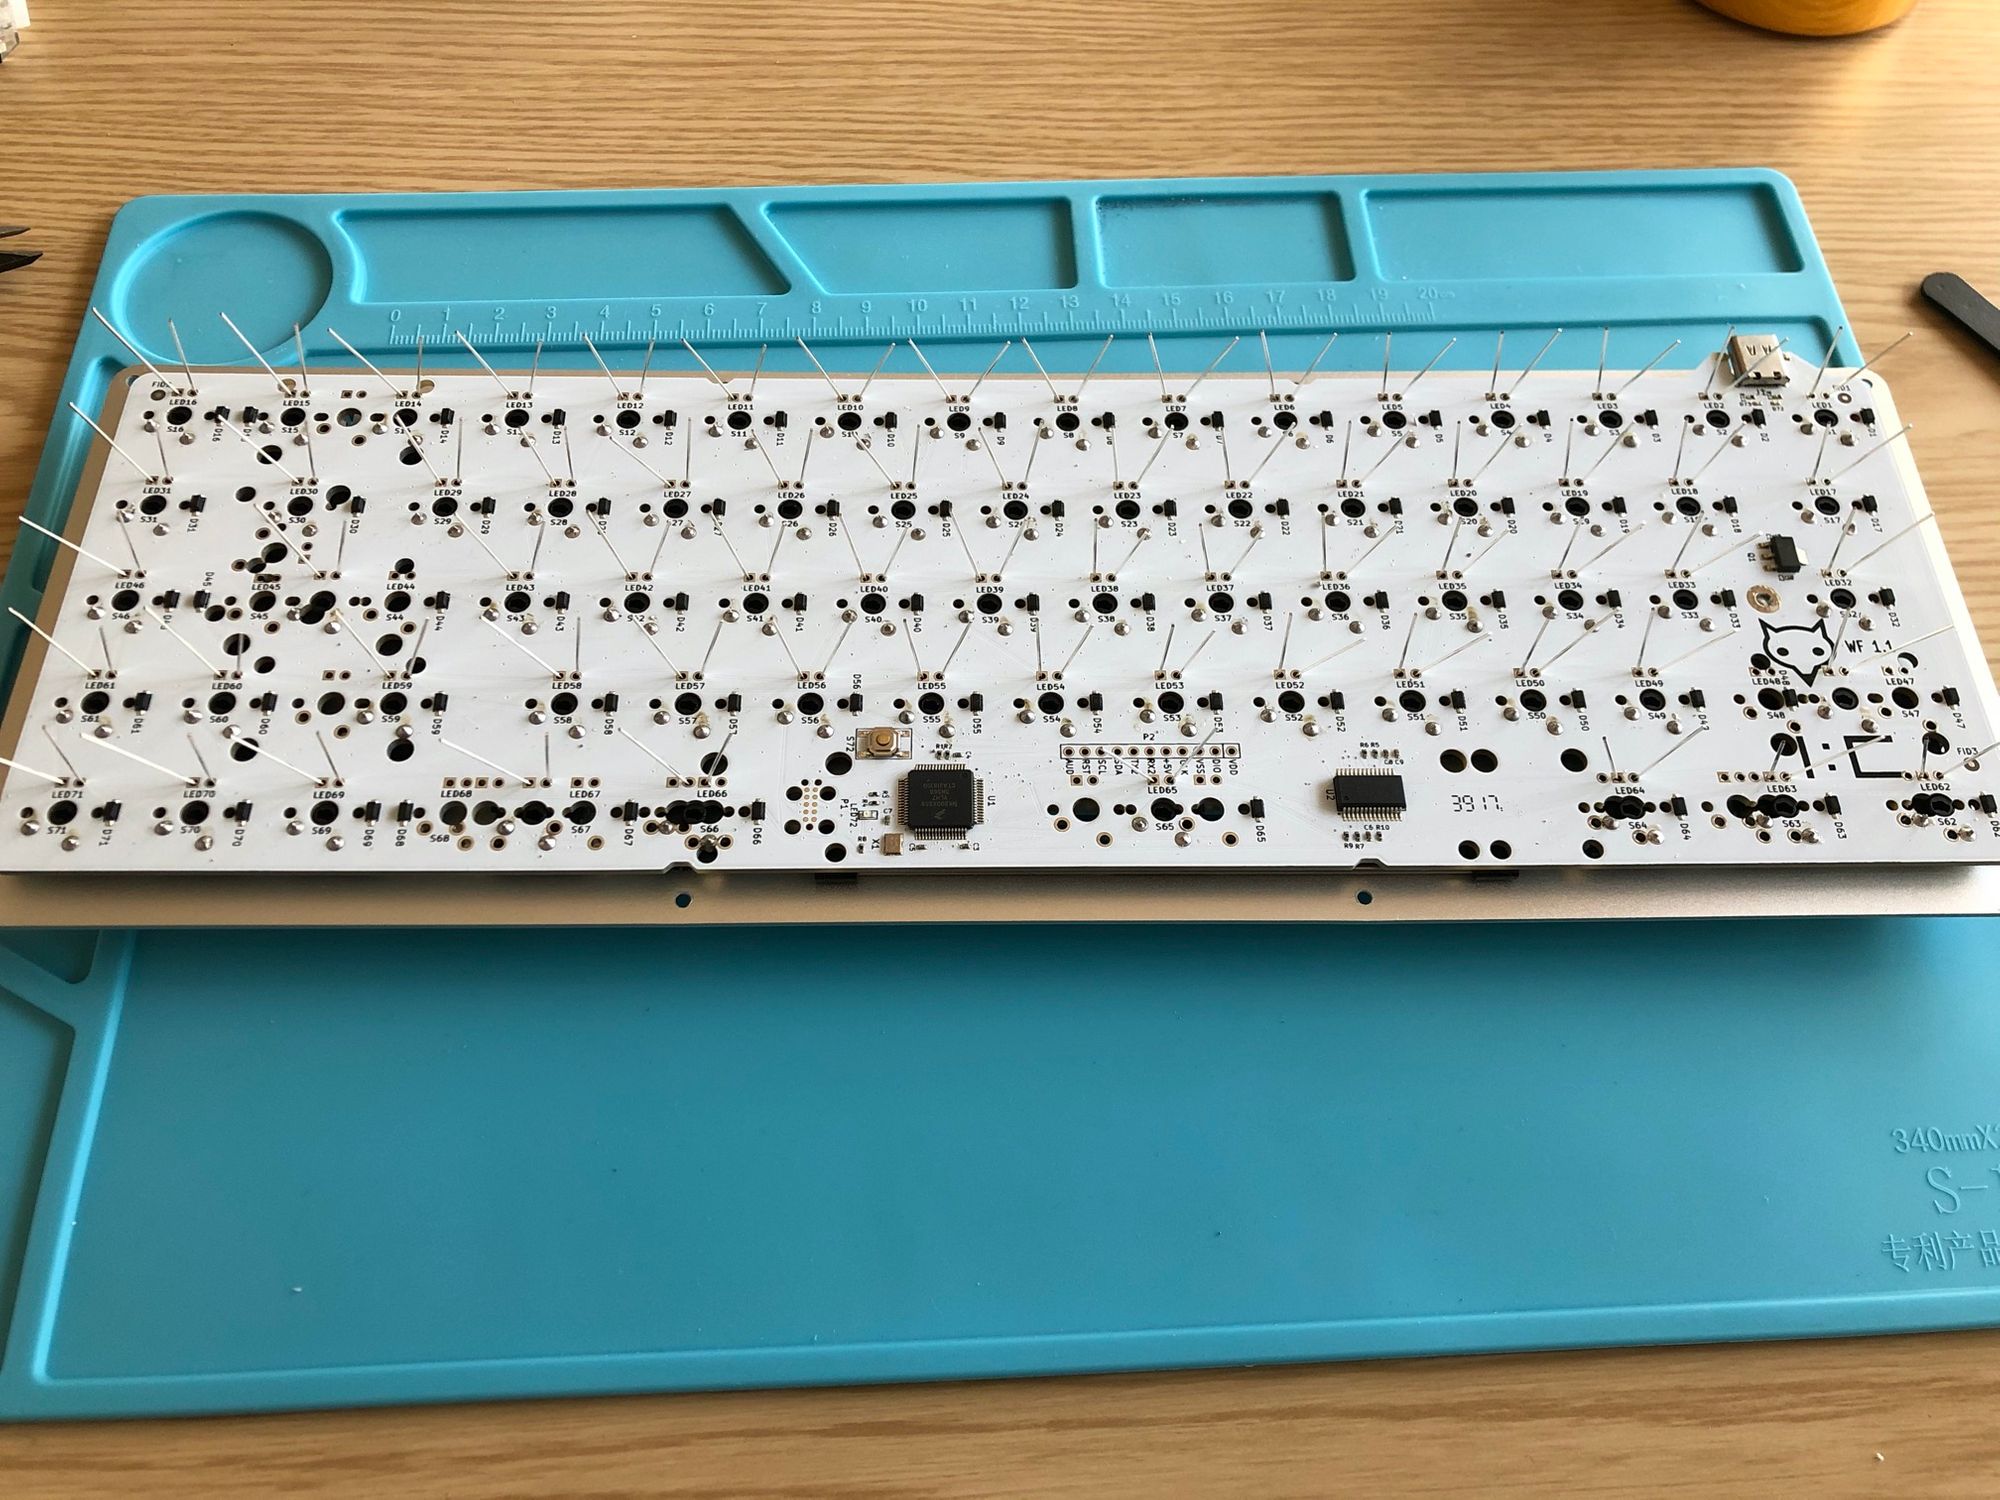
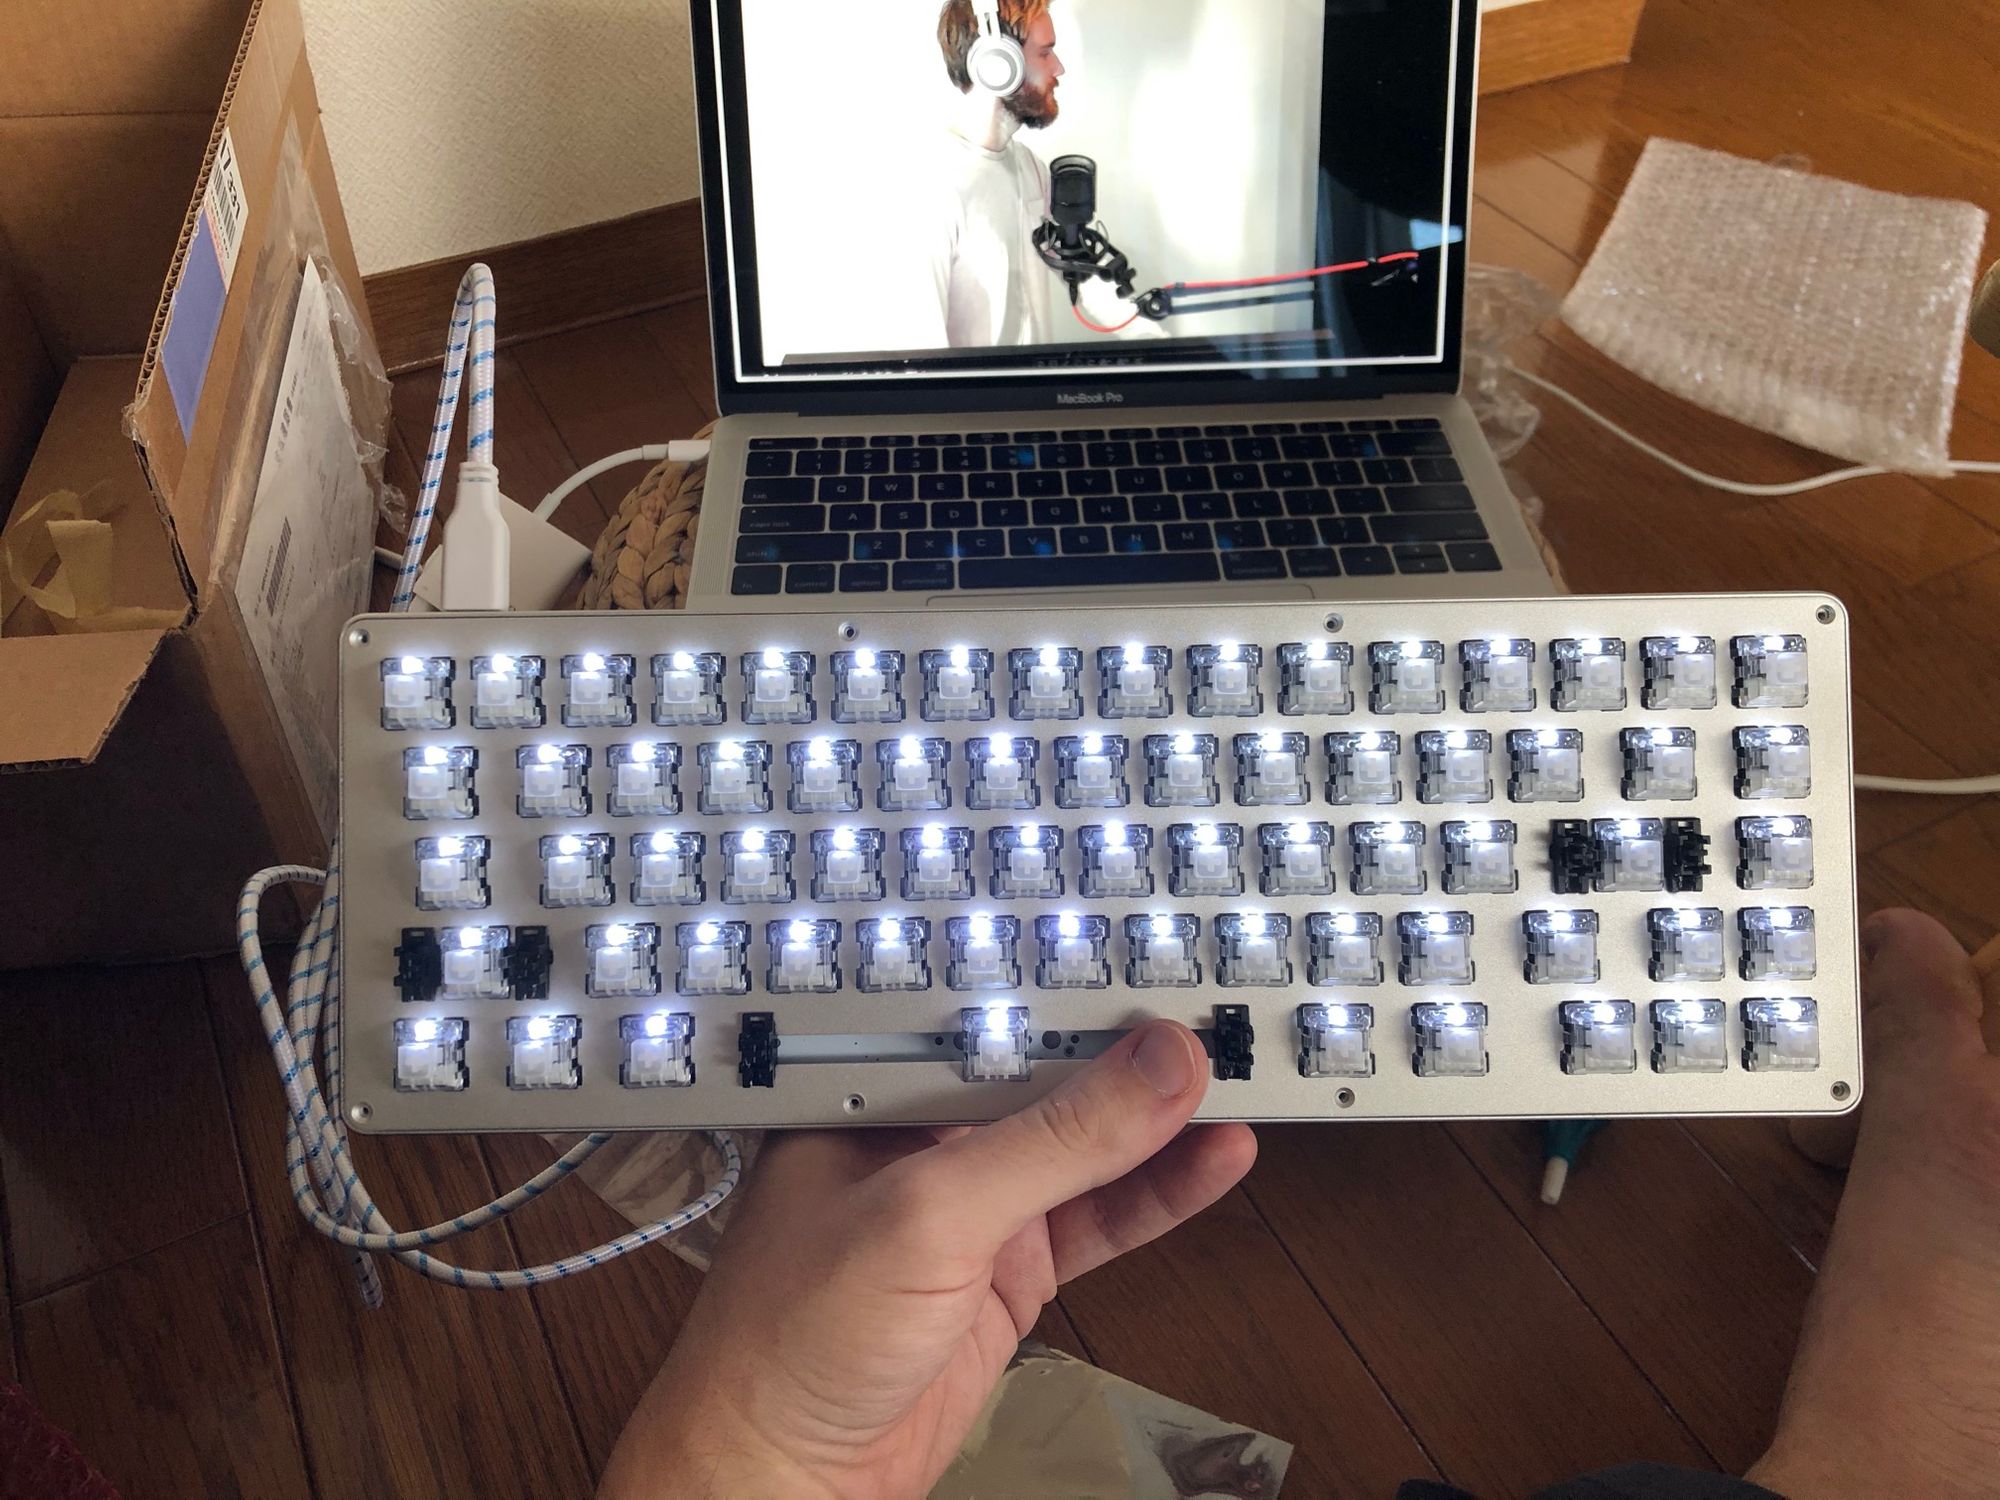
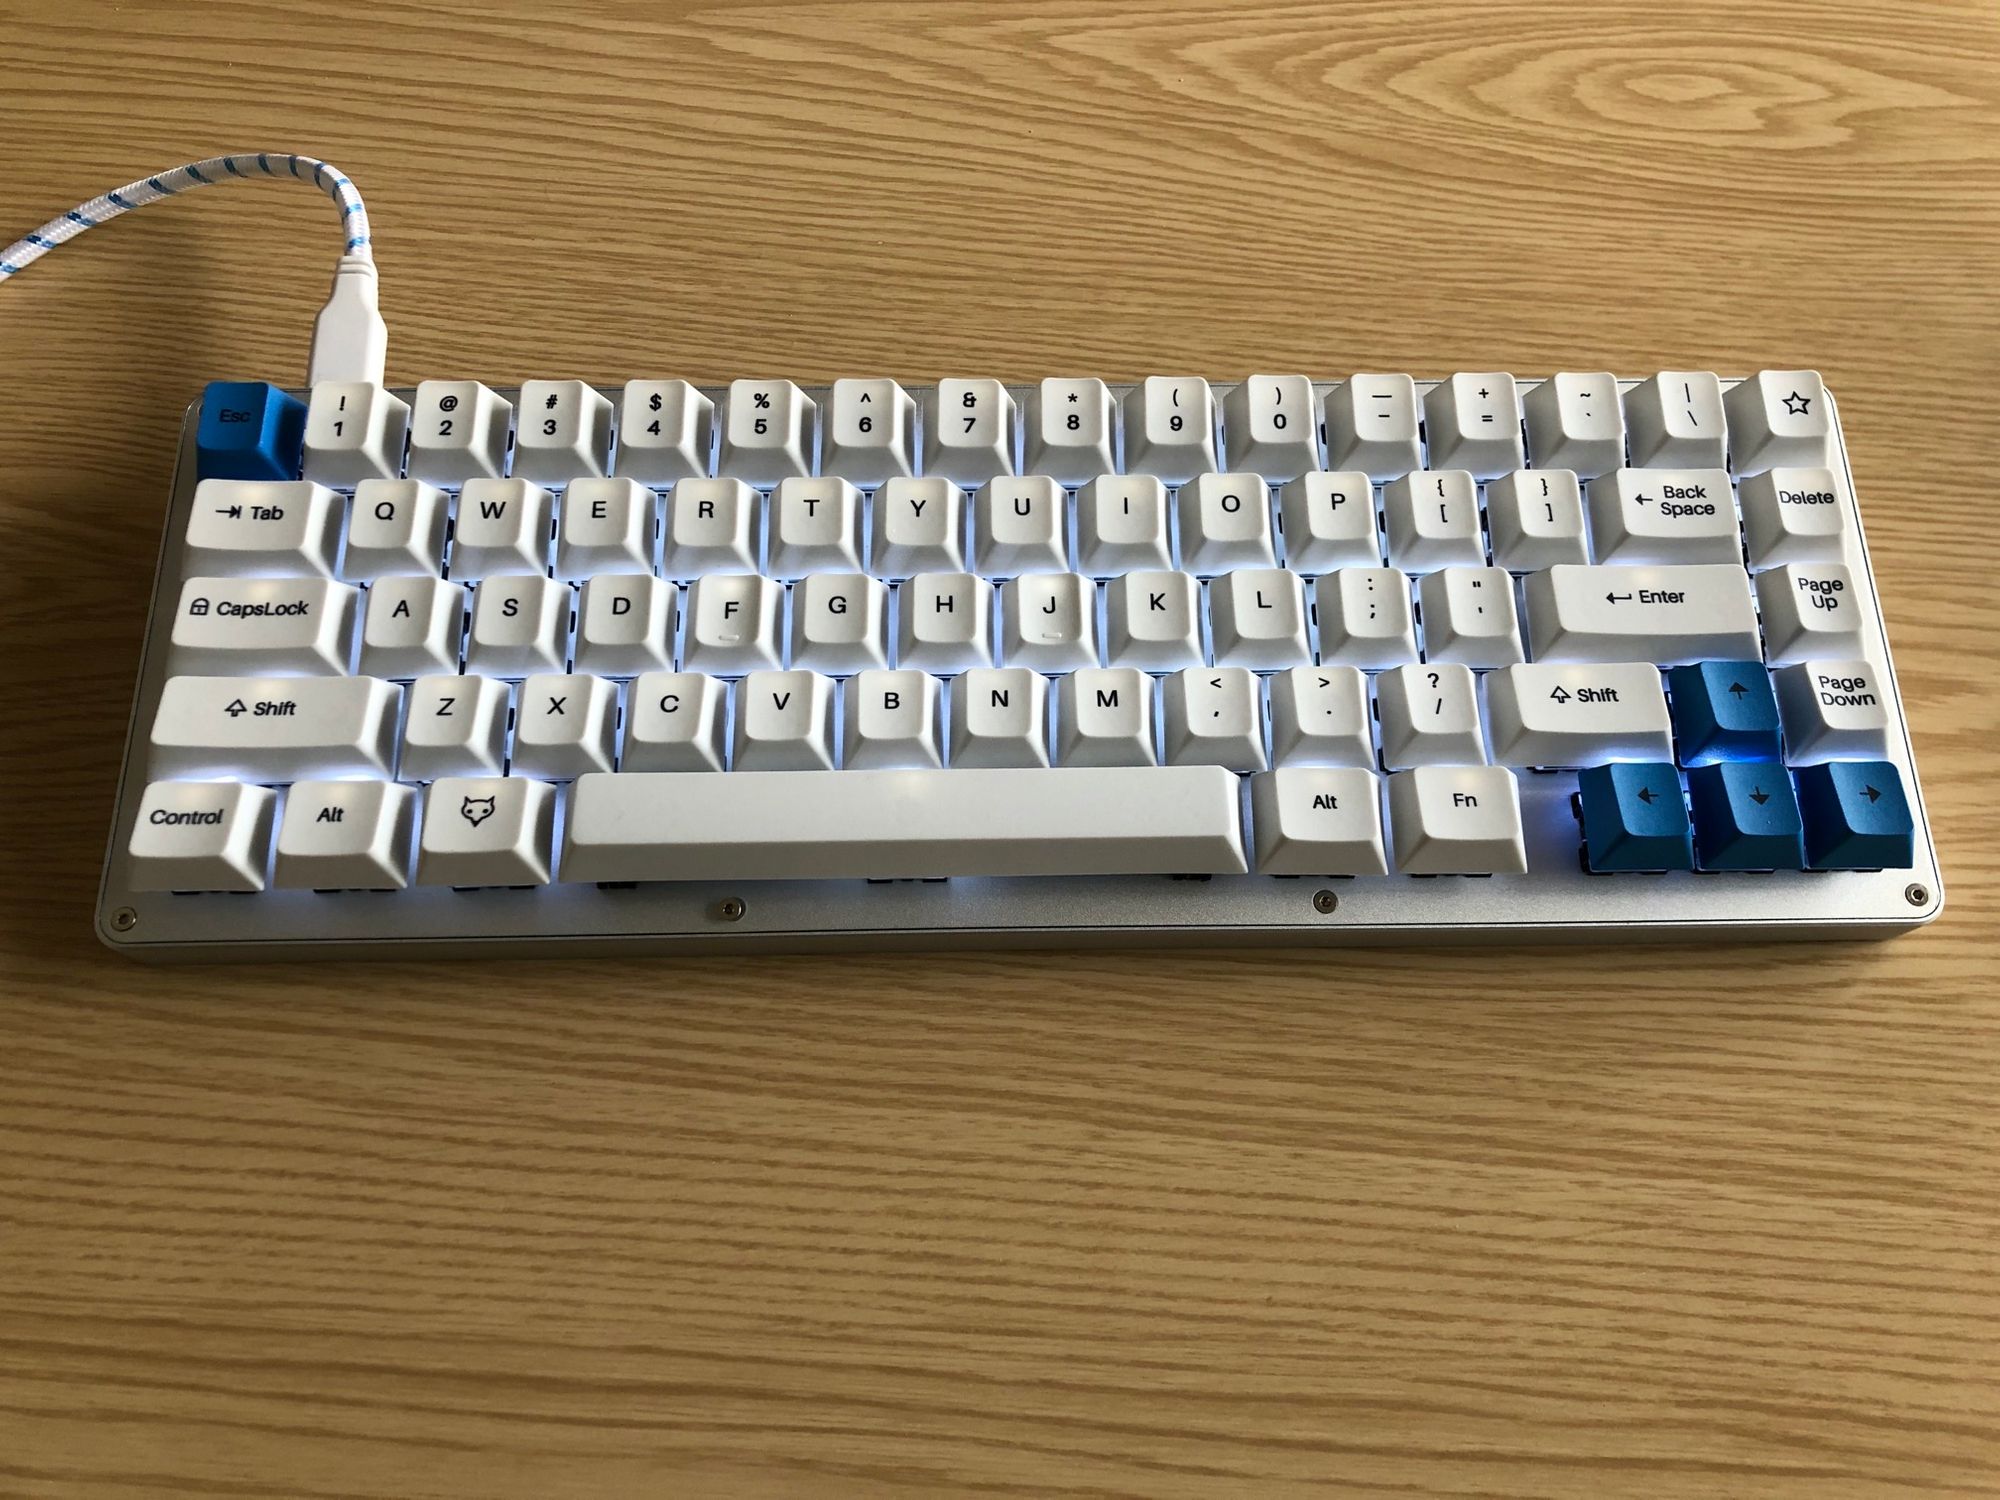
On Friday, the keyboard parts I ordered over three months ago finally arrived 🚚 On Saturday, I unpacked everything, verified I have all the things required to assemble the keyboard together, and tested the PCB by connecting it to the computer and shorting (shortening? English is difficult 🤣) each key pin with a pair of tweezers – and so the fox typed its first message!On Sunday, wife and kid were evicted from the apartment and sent to wife’s parents’ house 🤣 I quickly set up my work desk, and it was time to begin the fun part.First course of action, adjust the stabilizers that are keeping the larger keys (that is, LShift, Enter and Spacebar), well, stable. By default, stabilizers make sound only comparable to the sound of a rattlesnake, and nobody wants that 🐍To fix that, you have to clip two out of the four legs on each stabilizer stem, as shown in this photo 🦵 The two stems on the left side already only have half of their legs attached. Is this a crime against humanity stability? (Only at the very end of the build did I notice that because my stabilizers are plate-mounted, they never actually touch the PCB, even when bottomed-out. Oh well. Still a nice exercise! And yes, I removed the little rectangles of extra plastic later.)Clipped and lubed with two different kinds of lube (teflon grease where plastic touches plastic, dielectric grease where plastic touches the metal wire) for the perfect sound – that is, no sound at all 🔇Time to have some fun, time to put the switches in their place plate 👇The plate is full, I repeat – the plate is full, we can’t handle any more switches!After a short lunch break 🍕, it was time to flip the board and start soldering. These are the first six solder joints that I ever did on my own. I think they are quite passable, aren’t they?The soldering that I was so scared of turned out to be so much fun that I forgot to take any more photos of the process! So here’s a board with all the switches fully soldered in, and with LEDs waiting to receive the same treatment. I put one LED into each switch and bent their legs so that they don’t fall out of the sockets, for easy soldering.136 solder joints later… I call this a success! 🎉Time to put some keycaps on!WhiteFox in its natural habitat 🦊 (Natural habitat being “in front our office in the centre of Osaka, taking photos of a keyboard next to a nice bush while Japanese businessmen are working next to you and thinking something about ‘weird gaijin taking a photo of a… keyboard? What the heck?’ 😳”)