How to master a multi-stage continuous delivery of Vapor apps to a Kubernetes cluster
Wow, that title sure is a mouthful. I think is certainly breaks some sort of weird record for this site!

Wow, that title sure is a mouthful. I think is certainly breaks some sort of weird record for this site!
So you heard how awesome Docker is and how best to use
it with your Vapor app, and you also heard that Kubernetes is basically the best invention since sliced bread, but you’re not sure how exactly would you put all of that together? Well, then you’re just like me a few weeks ago! I’ll show you in this article one way of putting Docker and Kubernetes together, and while I’m not saying this is the best possible configuration… oh who am I kidding, of course I think that!
Let’s start with the list of services we’ll be using in this tutorial. Bear in mind that most of these can be replaced with a different provider, maybe one that you already use for your other projects, but to keep things simple, we’ll rely on Google Cloud Platform whenever possible[1].
- Repository hosting: Google Cloud Source Repositories (alternatives: GitHub, BitBucket, GitLab,…)
- Container builder: Google Container Builder (alternatives: any CI solutions, such as CircleCI, Travis CI, or if you hate yourself, Jenkins 🤯)
- Container image registry: Google Container Image Registry (alternatives: Docker Hub or self-hosted)
- Kubernetes cluster: hosted and managed with Google Kubernetes Engine (alternatives: self-managed with Kops)
- The “glue” that connects it all together: Spinnaker
Before we begin
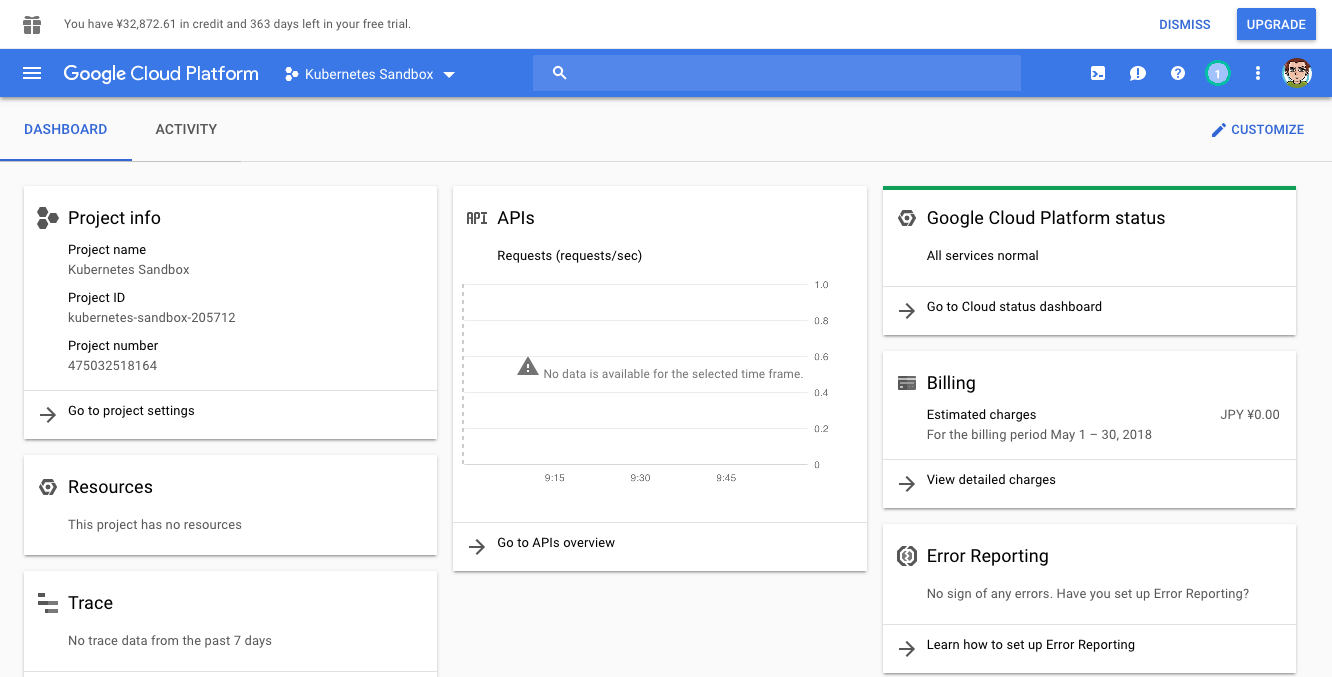
Let’s create the Kubernetes cluster first by heading to Google Cloud Platform and logging in to your account. If this is your first time using GCP, you can use the free trial to get $300 of free credit, which is more than enough for completing this tutorial. Once logged in, create an empty project here (mine is called “Kubernetes Sandbox” with project ID kubernetes-sandbox-205712, so whenever you see this ID throughout the rest of the article, make sure to replace it with your actual project ID) and after returning back to dashboard, make sure this newly created project is selected in the top left corner.
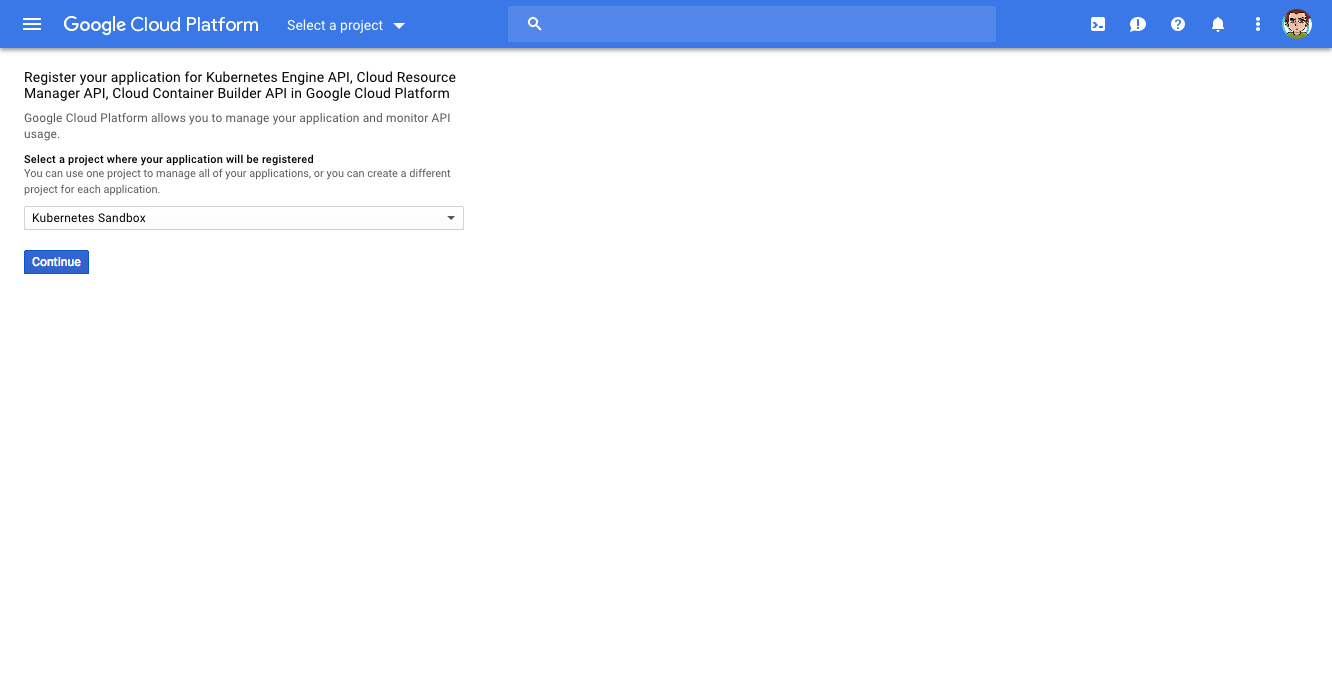
When you have your project, visit this page to enable Kubernetes Engine, Container Builder, and Resource Manager APIs in the project.
This might take a few minutes, so let’s setup your local environment while waiting.
Setting up your local environment
To interact with your GCP account as well as with your cluster, we’ll need a few tools. From terminal, install the Google Cloud SDK and Kubernetes control tools with the following commands:
$ brew install kubectl kubernetes-helm
$ brew cask install google-cloud-sdk
The kubectl tool is used to interact with your cluster, kubernetes-helm installs Helm, a package manager for Kubernetes, and google-cloud-sdk allows us to control your GCP account from the terminal. When everything is installed, run the gcloud init command to login to your GCP account. When prompted, select the project to use as a default one (in my case, kubernetes-sandbox-205712) and set your default zone to us-central1-f.
Starting the cluster
I’m not sure if this section even deserves its own heading because starting your own Kubernetes cluster in GKE is as simple as running the following command:
$ gcloud container clusters create vapor-tutorial –machine-type=n1-standard-2
Do so and your cluster should be up and running in a few minutes. You can always check the progress here.
Configuring identity and access management
While we’re waiting for the cluster to be ready, let’s create service account for Spinnaker so that it can store its configuration in Google Cloud Storage. Run the following commands (be sure to only run the versions for the shell you actually use):
$ gcloud iam service-accounts create spinnaker-storage-account --display-name spinnaker-storage-account

# Fish version
$ set -x SA_EMAIL (gcloud iam service-accounts list --filter="displayName:spinnaker-storage-account" --format='value(email)')
$ set -x PROJECT (gcloud info --format='value(config.project)')

# Bash version
$ export SA_EMAIL=$(gcloud iam service-accounts list --filter="displayName:spinnaker-storage-account" --format='value(email)')
$ export PROJECT=$(gcloud info --format='value(config.project)')

# Both shells
$ gcloud projects add-iam-policy-binding $PROJECT --role roles/storage.admin --member serviceAccount:$SA_EMAIL
$ gcloud iam service-accounts keys create spinnaker-sa.json --iam-account $SA_EMAIL
As a result of these commands, the spinnaker-storage-account service account was created (you can verify that here) with the roles/storage.admin role assigned (verify here. Furthermore, credentials to authenticate with that service role have been stored in the spinnaker-sa.json file in your current directory.
Deploying Spinnaker using Helm
To deploy Spinnaker in our Kubernetes cluster, we’ll use the Helm package manager. The following commands create a cluster-admin role in Kubernetes for Tiller (server-side component of Helm) and Spinnaker (so that it can manipulate Kubernetes configuration) and then initialize Helm & Tiller in the cluster:
# Fish version
$ kubectl create clusterrolebinding user-admin-binding --clusterrole=cluster-admin --user=(gcloud config get-value account)

# Bash version
$ kubectl create clusterrolebinding user-admin-binding --clusterrole=cluster-admin --user=$(gcloud config get-value account)

# Both shells
$ kubectl create serviceaccount tiller --namespace kube-system
$ kubectl create clusterrolebinding tiller-admin-binding --clusterrole=cluster-admin --serviceaccount=kube-system:tiller
$ kubectl create clusterrolebinding --clusterrole=cluster-admin --serviceaccount=default:default spinnaker-admin
$ helm init --service-account=tiller
$ helm update
You can verify that everything works properly with the helm version command. After that, the following commands will create bucket to store Spinnaker’s configuration and and a configuration file that will grant Spinnaker access to the service account we created earlier:
# Fish version
$ set -x BUCKET $PROJECT-spinnaker-config

# Bash version
$ export BUCKET=$PROJECT-spinnaker-config

# Both
$ gsutil mb -c regional -l us-central1 gs://$BUCKET

# Bash-only, not sure how to re-write this for Fish
# If using Fish, hold your nose and switch to Bash for a second
$ export SA_JSON=$(cat spinnaker-sa.json)
$ export PROJECT=$(gcloud info --format='value(config.project)')
$ export BUCKET=$PROJECT-spinnaker-config
$ cat > spinnaker-config.yaml <<EOF
storageBucket: $BUCKET
gcs:
  enabled: true
  project: $PROJECT
  jsonKey: '$SA_JSON'

# Disable minio as the default
minio:
  enabled: false

# Configure your Docker registries here
accounts:
- name: gcr
  address: https://gcr.io
  username: _json_key
  password: '$SA_JSON'
  email: [email protected]
EOF
Finally, deploy Spinnaker with the following command:
$ helm install -n cd stable/spinnaker -f spinnaker-config.yaml --timeout 600 --version 0.3.1
This command will run for at least two minutes, so don’t panic. If you wish to peek under the skirthood of the deployment progress, you can do so by issuing the watch -n 5 -d -t kubectl get deployments command.
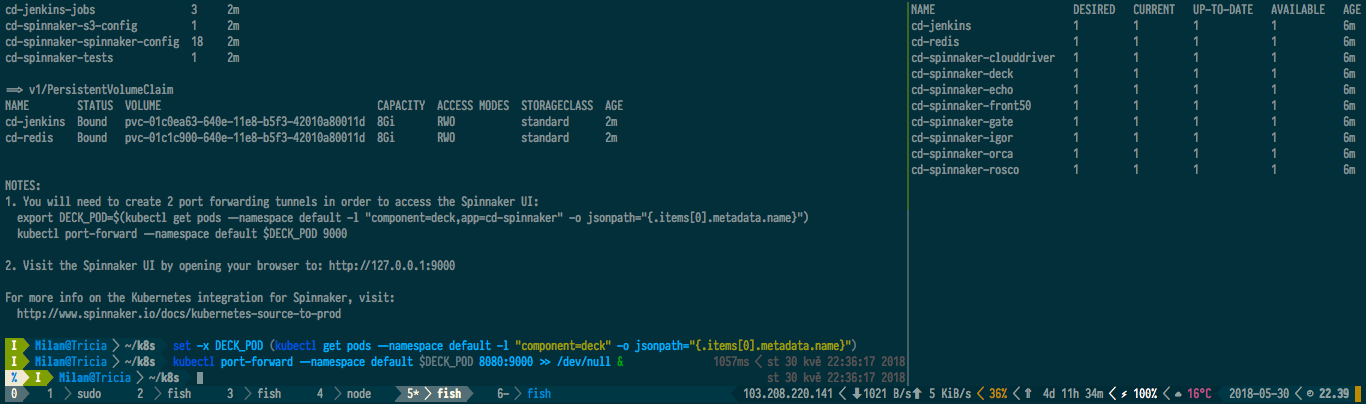
After Spinnaker is installed, set up port-forwarding to access its UI:
# Fish version
$ set -x DECK_POD (kubectl get pods --namespace default -l "component=deck" -o jsonpath="{.items[0].metadata.name}")

# Bash version
$ export DECK_POD=$(kubectl get pods --namespace default -l "component=deck" -o jsonpath="{.items[0].metadata.name}")

# Both shells
$ kubectl port-forward --namespace default $DECK_POD 8080:9000 >> /dev/null &
Point your browser at http://localhost:8080 and you should be greeted by Spinnaker’s dashboard. But before we get into that, let us set up our project.
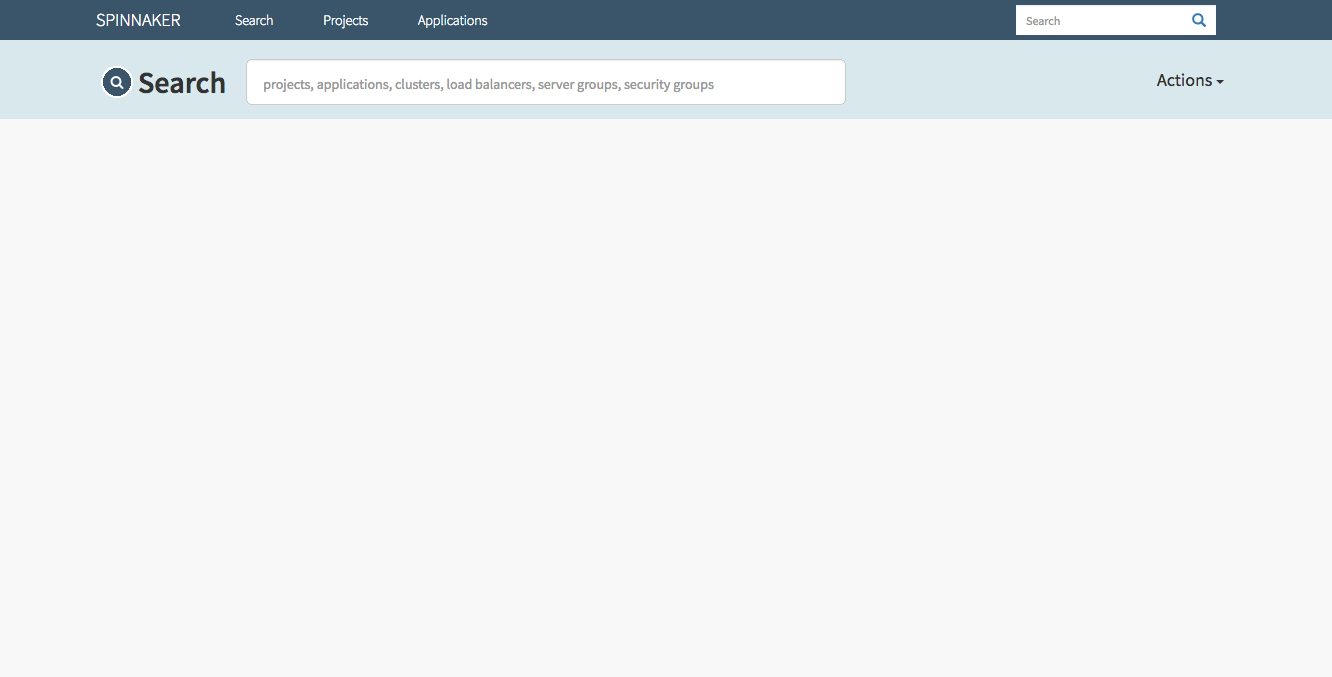
Setting up a source code repository
For this tutorial, I’ll use Tim Condon’s TIL Application from his excellent book about server-side Swift – we are, after all, mostly interested in setting all this up for our Vapor projects. If you don’t own the book yet, you are doing something seriously wrong with your life. Clone the repository with git clone https://github.com/raywenderlich/vapor-til.git and in the root of the repository, create a production-grade Dockerfile, called Dockerfile.production:
FROM swift:4.1 as builder
WORKDIR /app
COPY . .
RUN mkdir -p /build/lib && cp -R /usr/lib/swift/linux/*.so /build/lib
RUN swift build -c release && mv `swift build -c release --show-bin-path` /build/bin

FROM ubuntu:16.04
RUN apt-get -qq update && \
    apt-get install -y libicu55 libxml2 libbsd0 libcurl3 libatomic1 tzdata && \
    rm -r /var/lib/apt/lists/*
WORKDIR /app
COPY --from=builder /build/bin/Run .
COPY --from=builder /build/lib/* /usr/lib/
COPY Public/ ./Public/
COPY Resources/ ./Resources/
EXPOSE 8080
ENTRYPOINT ["./Run", "serve", "-e", "prod", "-b", "0.0.0.0"]
Set up a remote repository (if you are asked about enabling API when issuing the first command, confirm with y) and commit your Dockerfile with the following commands:
$ gcloud source repos create tilapp
$ git config credential.'https://source.developers.google.com'.helper gcloud
$ git remote add gcp https://source.developers.google.com/p/$PROJECT/r/tilapp
$ git add .
$ git commit -m "Added production Dockerfile"
$ git push gcp master
After the code is pushed, you should be able to see your code here.
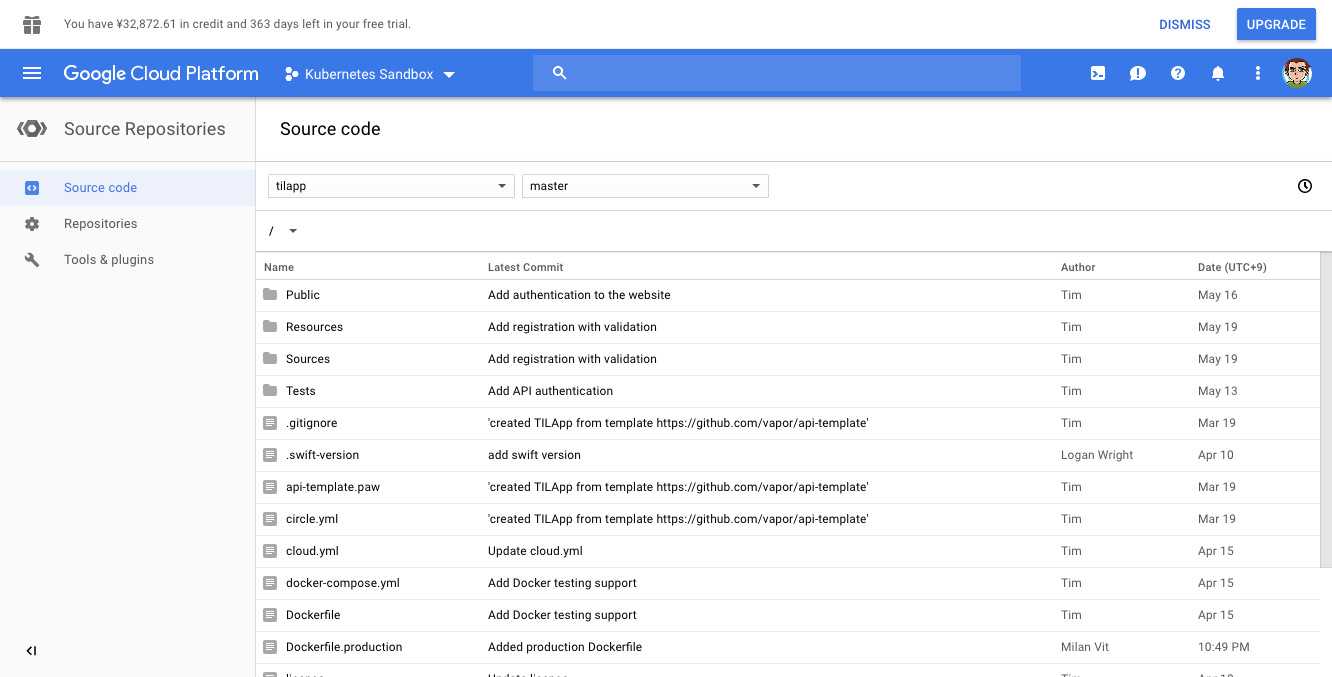
The next step is configuring Google Container Builder to build a Docker image for us automatically anytime we push a new tag. To do so, navigate here, select Cloud Source Repository and confirm with Continue. In the next step, select our repository (tilapp) and in the last step, choose the following options:
- Name:
tilapp-tags - Trigger type: Tag
- Tag (regex):
v.* - Build configuration:
Dockerfile - Dockerfile directory: (leave empty)
- Dockerfile name:
Dockerfile.production - Image name:
gcr.io/kubernetes-sandbox-205712/$REPO_NAME:$TAG_NAME(make sure to replace the project name with your project name, of course)
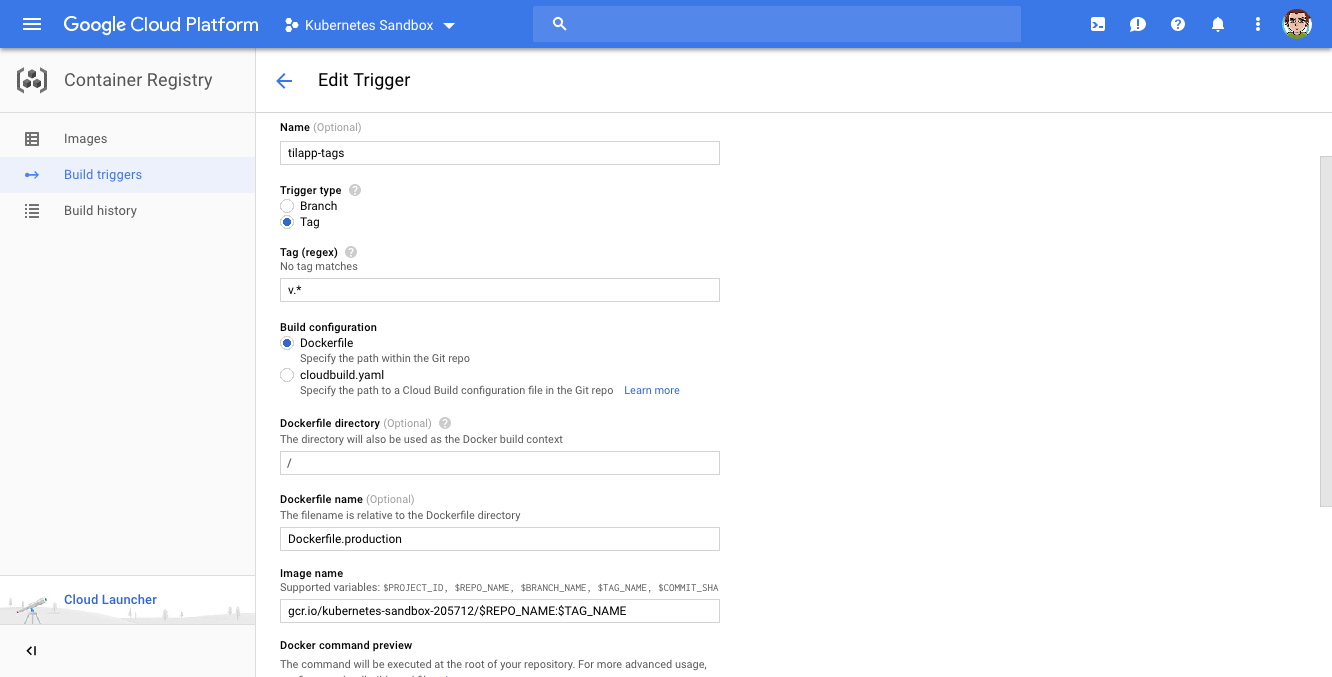
Confirm by clicking the Create trigger button and return to the terminal: let’s test the trigger by pushing a tag to our repository!
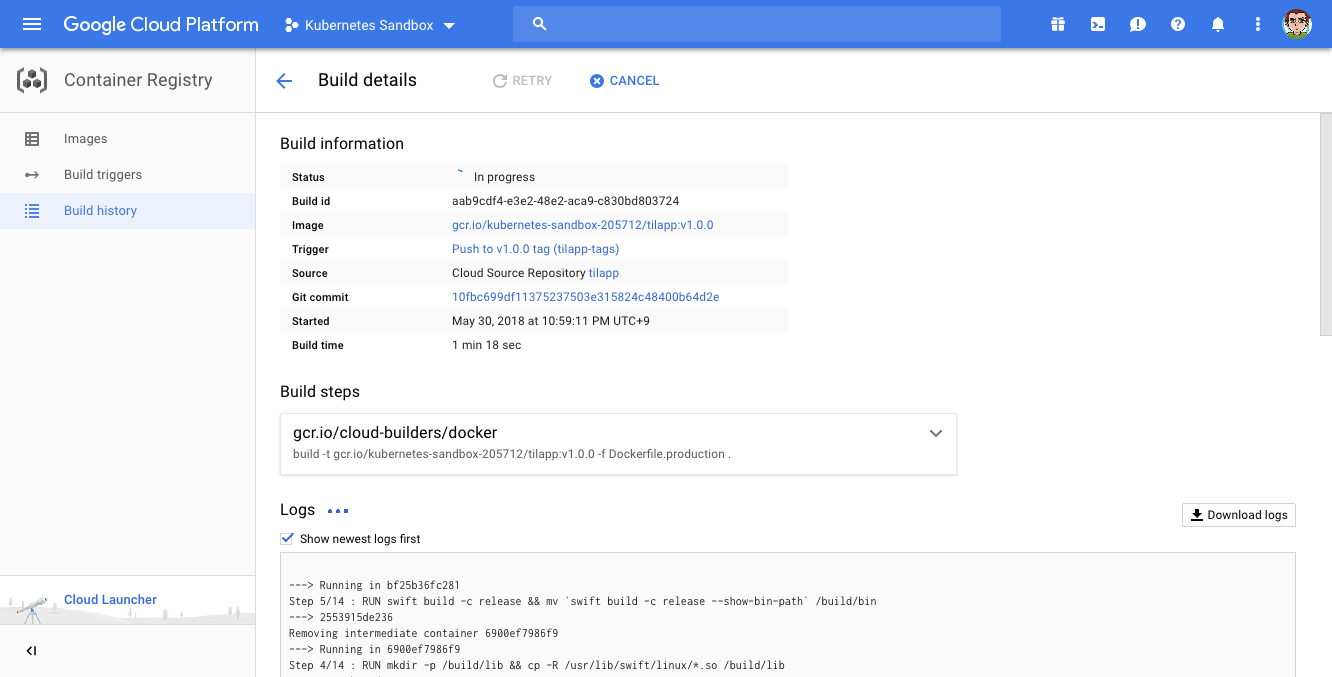
$ git tag v1.0.0
$ git push gcp –tags
If everything went well, you should see a build going on here.
Configuring the pipeline
Back in Spinnaker’s dashboard, click on the Actions button and select the Create Application option. Fill in the form like this:
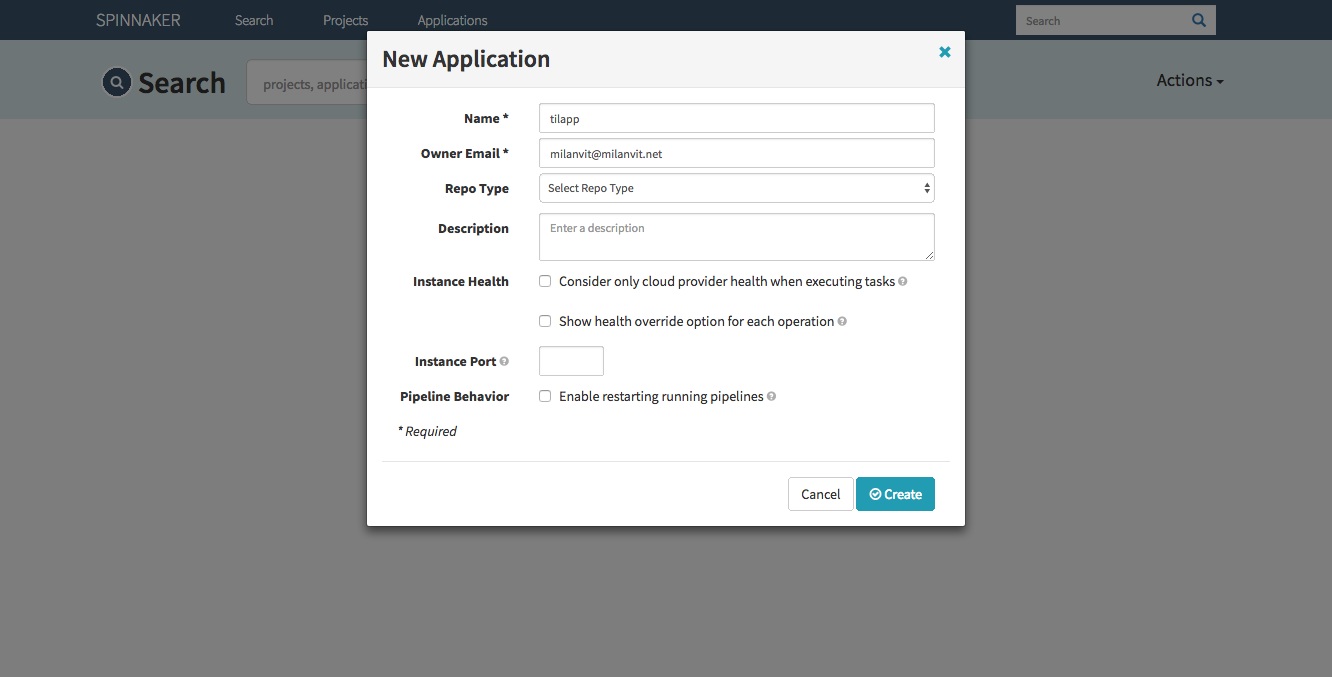
Confirm by clicking on the Create button. Let’s switch back to terminal for a second again and create two load balancers by creating following YAML files:
apiVersion: v1
kind: Service
metadata:
  labels:
    app: tilapp-vapor-canary
  name: tilapp-vapor-canary
spec:
  ports:
  - name: 80-80
    port: 80
    protocol: TCP
    targetPort: 8080
  selector:
    tilapp-vapor-canary: "true"
  sessionAffinity: None
  type: LoadBalancer
apiVersion: v1
kind: Service
metadata:
  labels:
    app: tilapp-vapor-production
  name: tilapp-vapor-production
spec:
  ports:
  - name: 80-80
    port: 80
    protocol: TCP
    targetPort: 8080
  selector:
    tilapp-vapor-production: "true"
  sessionAffinity: None
  type: LoadBalancer
I called mine loadbalancer-canary.yaml and loadbalancer-production.yaml, but the naming doesn’t really matter because you can just import them both into your cluster by issuing the kubectl apply -f *.yaml command in the directory in which you stored the YAML files.
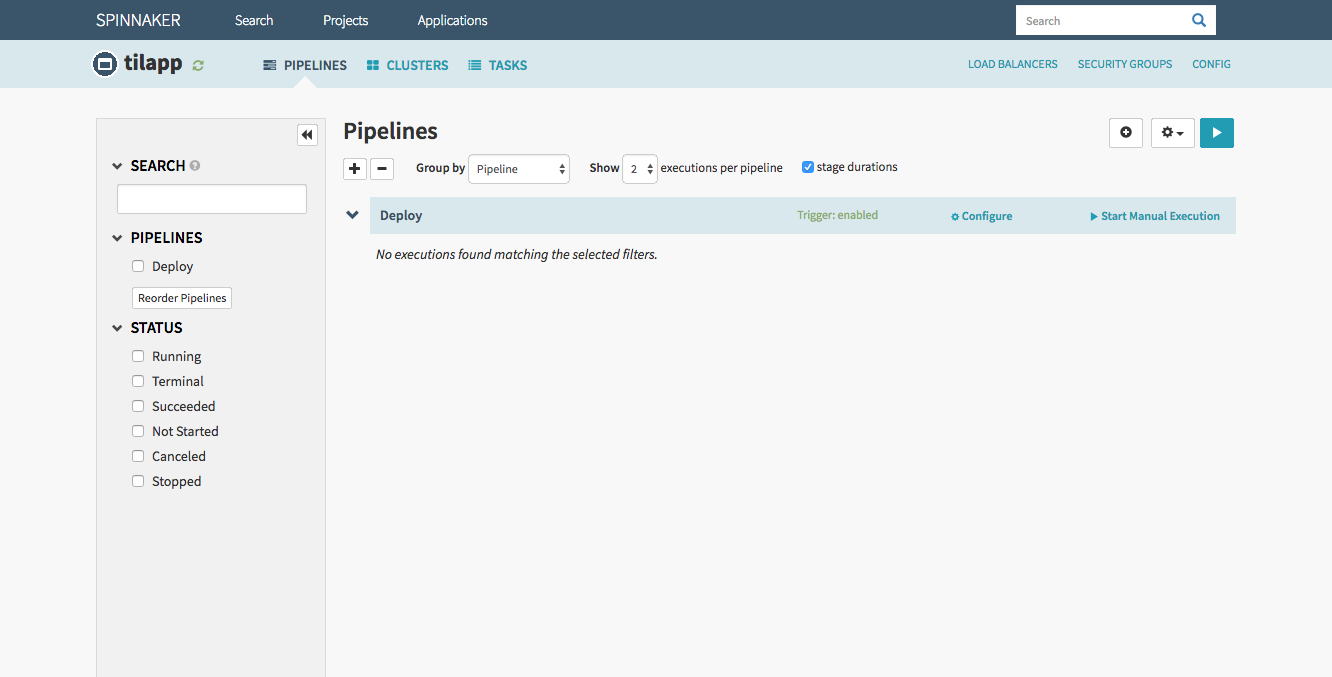
Back in Spinnaker’s UI, click on Pipelines in the top left corner, then the button with a plus symbol in the top right corner. Call your pipeline Deploy and confirm with Create. The dashboard takes you to the section where you can create pipeline by combining different stages. Our pipeline will be rather simple, so let’s start by configuring the stage Spinnaker already created for us, called Configuration.
In the Automated Triggers section, click the Add Trigger button and fill in the following details:
- Type: Docker Registry
- Registry Name:
gcr - Organization:
kubernetes-sandbox-205712(this will of course differ for you) - Image:
kubernetes-sandbox-205712/tilapp - Tag:
v.*

Save changes by clicking the Save button in the bottom right corner.
Once that’s done, create another stage by clicking the Add Stage button and configure it like this:
- Type: Deploy
- Stage Name: Deploy to Canary
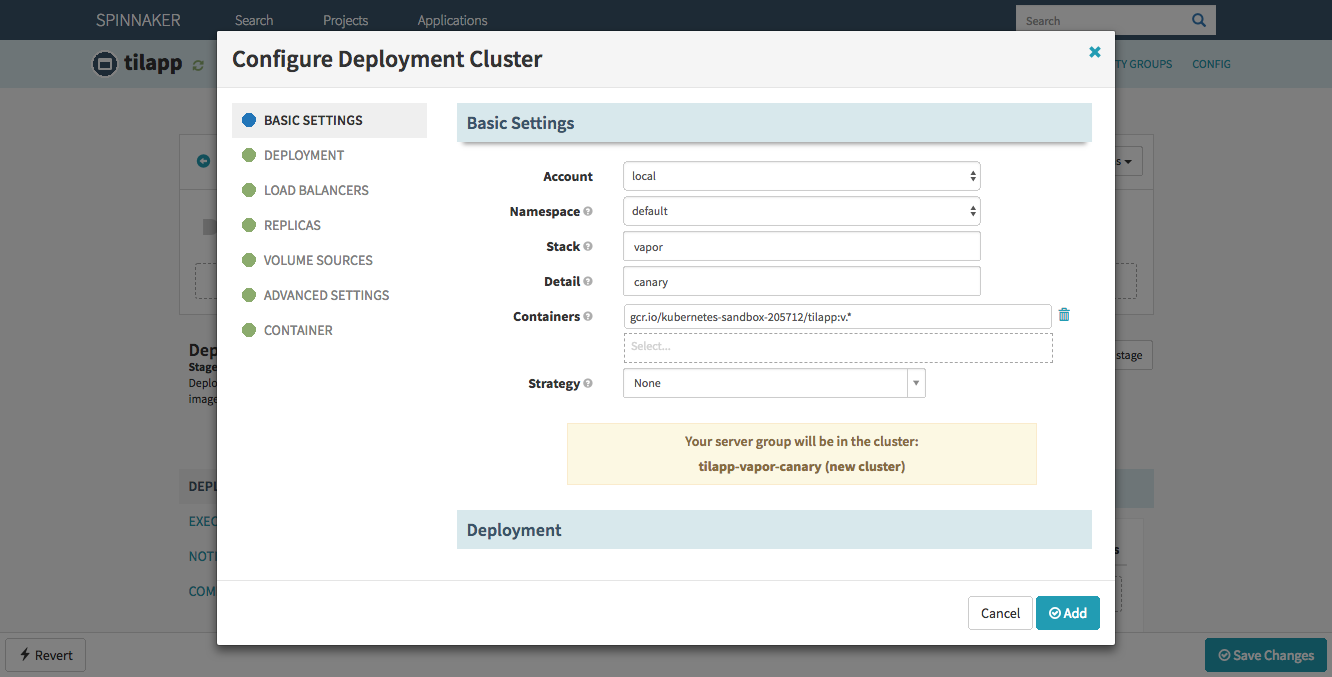
In the Deploy Configuration section, click the Add server group button, choose Copy without a template and fill in the following details:
- Stack:
vapor - Detail:
canary - Containers:
gcr.io/kubernetes-sandbox-207512/tilapp:v.* - Deployment: check
- History Limit: 2
- Max Surge: 100%
- Max Unavailable: 0%
- Load Balancers:
tilapp-vapor-canary - Pull Policy:
ALWAYS - Container ↝ Ports ↝ Container Port: 8080
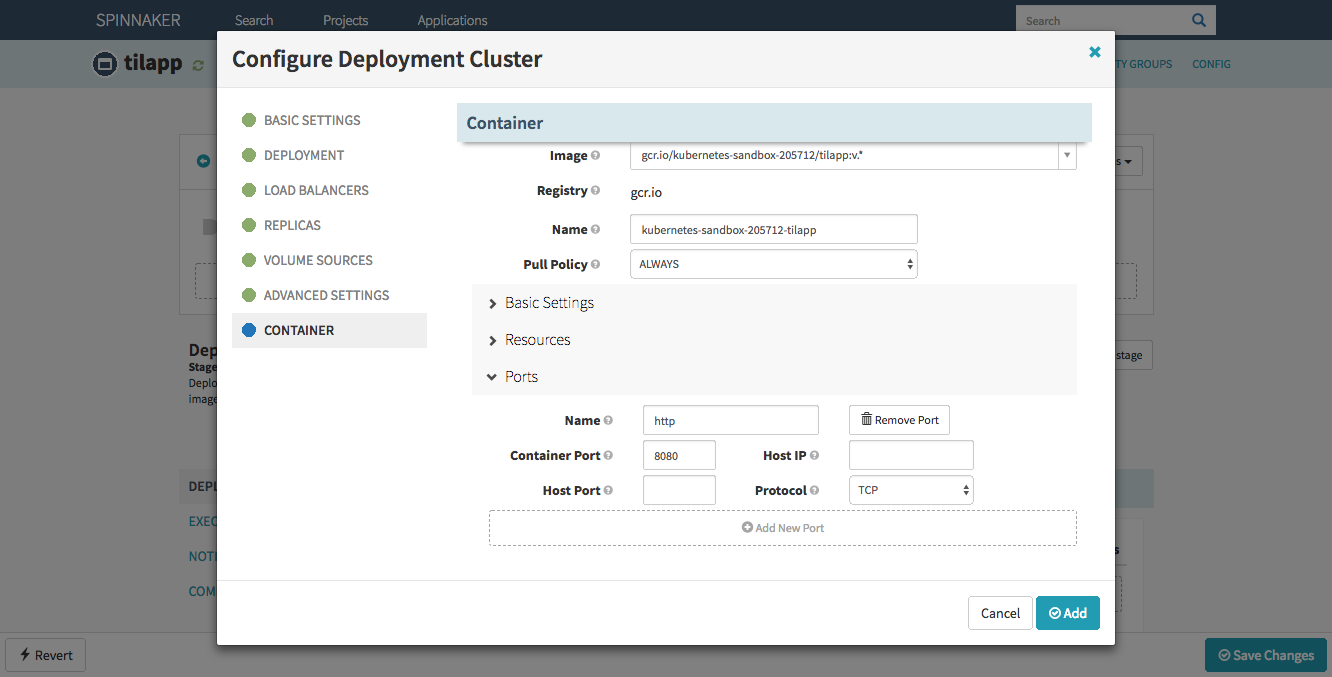
Confirm with Add – but wait, haven’t we forgotten something?
If you’re familiar with the TIL Application, you know it uses PostgreSQL database to store all the acronyms. But we haven’t configured any database just yet! Fortunately, we can use Helm for that, and while we’re at it, we can actually provision two separate databases: one for the Canary environment and one for the Production environment.
$ helm install -n db-canary stable/postgresql --set postgresPassword=password,postgresDatabase=vapor
$ helm install -n db-production stable/postgresql --set postgresPassword=password,postgresDatabase=vapor
Of course, you should pick a bit safer password, or even omit specifying it completely and have Helm auto-generate the password for you – but hey, it’ll do for now.
Back in Spinnaker’s dashboard, edit the server group you just created and scroll to the Container ↝ Basic Settings section. Expand it and in the Environmental Variables sub-section, add a new variable with following configuration:
- Name:
DATABASE_URL - Value:
postgres://postgres:[email protected]:5432/vapor
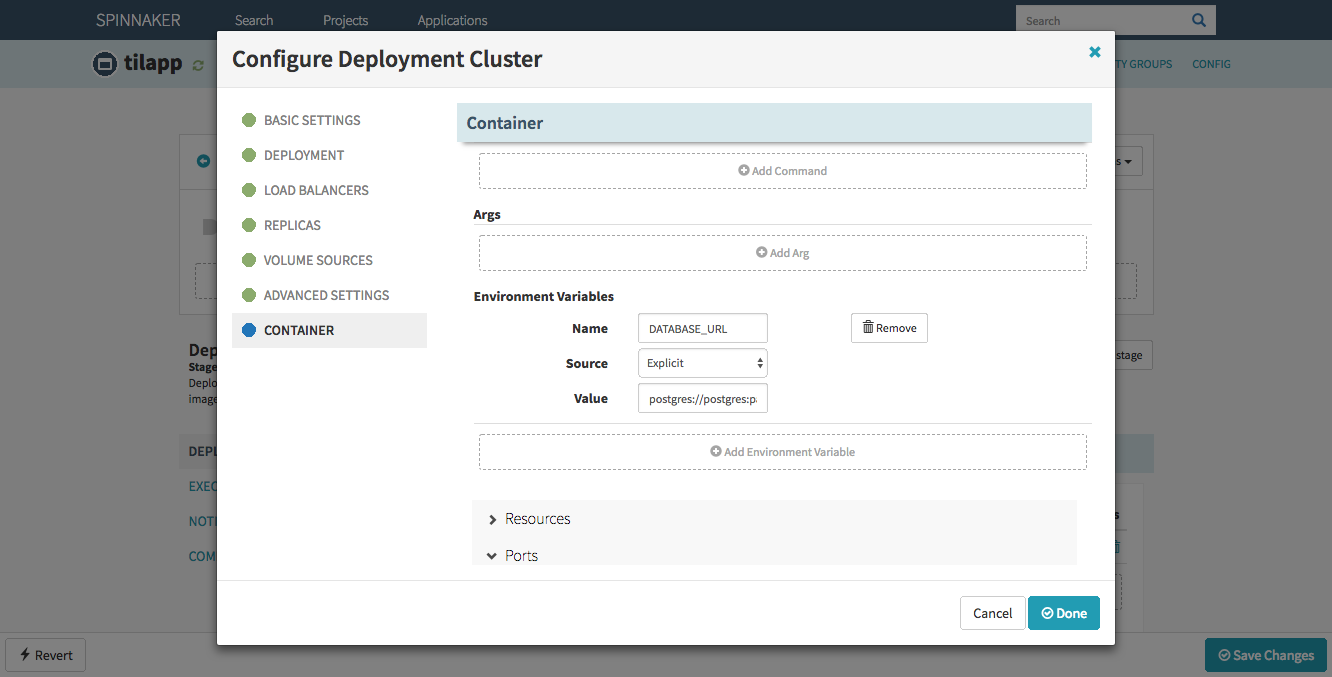
In production environment, it would be better if the value came out of Kubernetes secret, but I’ll kindly leave that up to you. Confirm the change by pressing the Done button and add another stage.
- Type: Manual Judgement
- Stage Name: Push to Production?
Save again and finally, add last stage:
- Type: Deploy
- Stage Name: Deploy to Production
Click the Add server group button again and fill the details. They are very similar to the Canary environment, with just a few changes, specifically number of desired pods, used load balancer and database URL.
- Stack:
vapor - Detail:
production - Containers:
gcr.io/kubernetes-sandbox-207512/tilapp:v.* - Deployment: check
- History Limit: 2
- Max Surge: 100%
- Max Unavailable: 0%
- Load Balancers:
tilapp-vapor-production - Capacity: 8
- Environmental Variables:
- Name:
DATABASE_URL - Value:
postgres://postgres:[email protected]:5432/vapor
- Name:
- Pull Policy:
ALWAYS - Container ↝ Ports ↝ Container Port: 8080
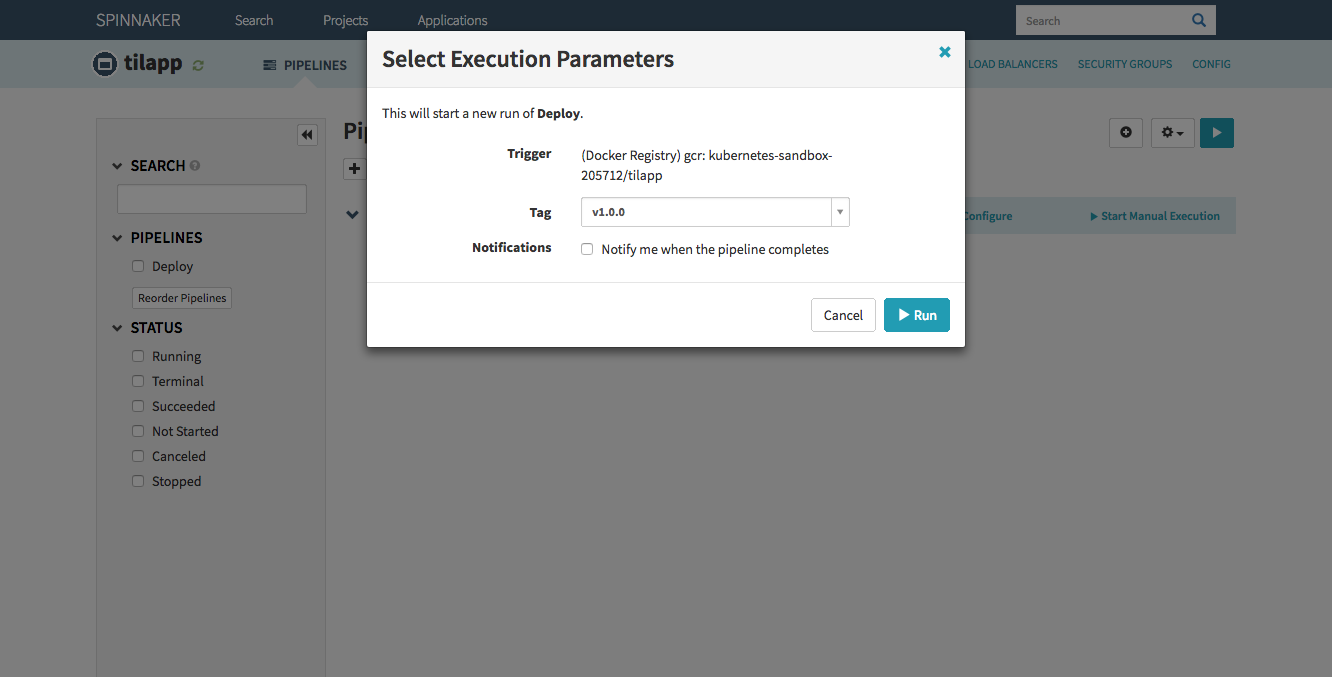
Save changes and let’s try it! Return back to the main screen and click the Start Manual Execution link. Select the tag v1.0.0 and watch!
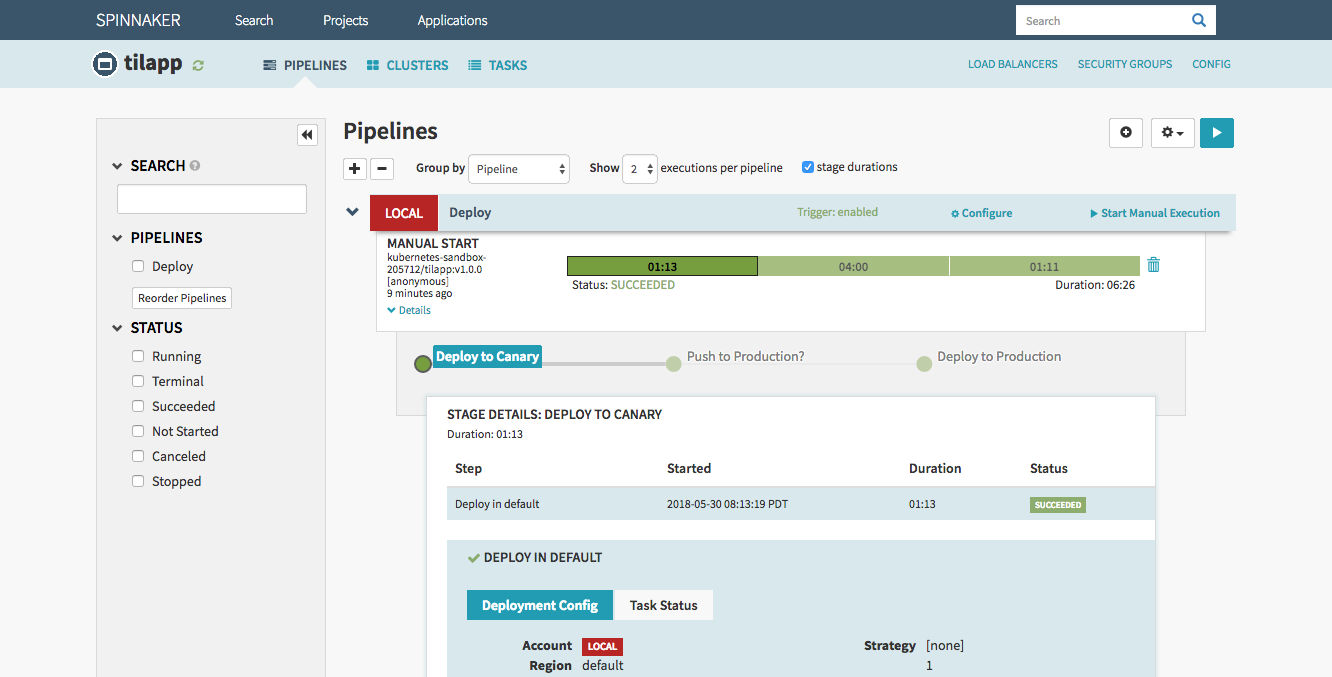
Once the first stage (Canary) is finished, before deploying to Production, you should of course check the result of your hard work. Click the Load Balancers link in the top right corner of the window and select the Default load balancer under the tilapp-vapor-canary section. Scroll down in the right part of the window until you see the Ingress IP address – click it and be amazed by your freshly deployed app! Try to register an user and make any changes so that you can verify that Production and Canary environments truly use different databases.
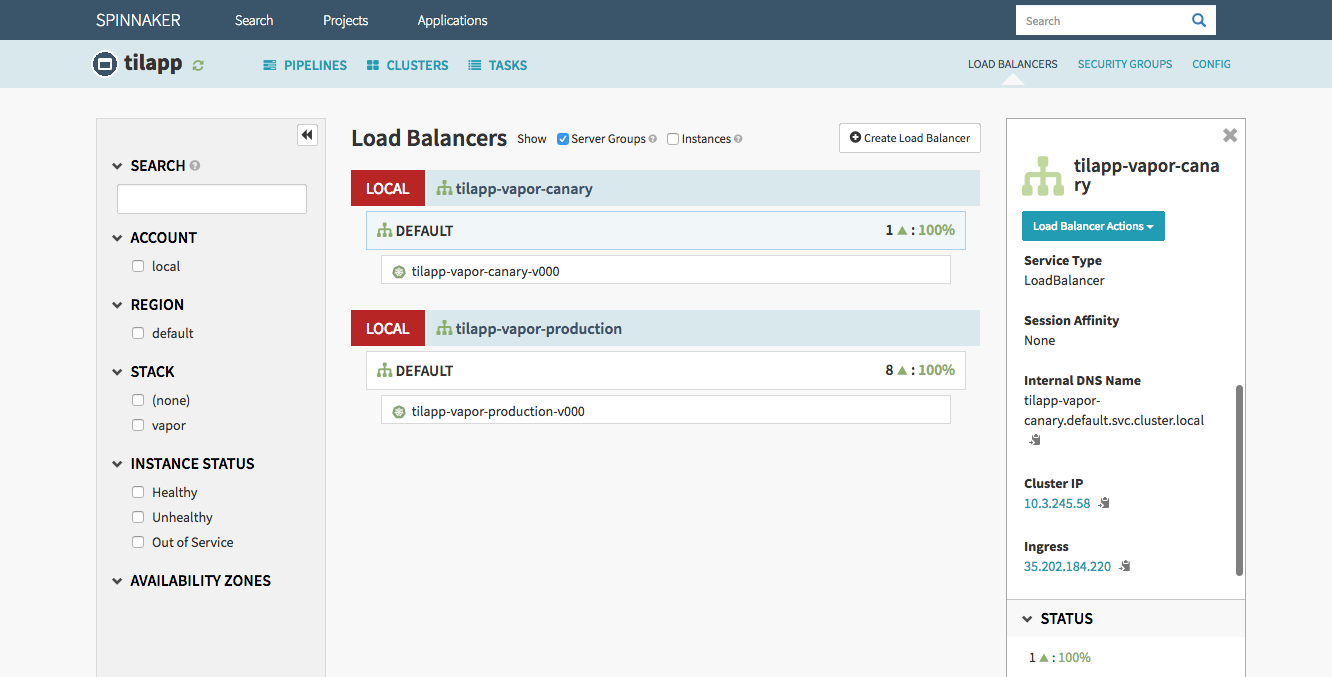
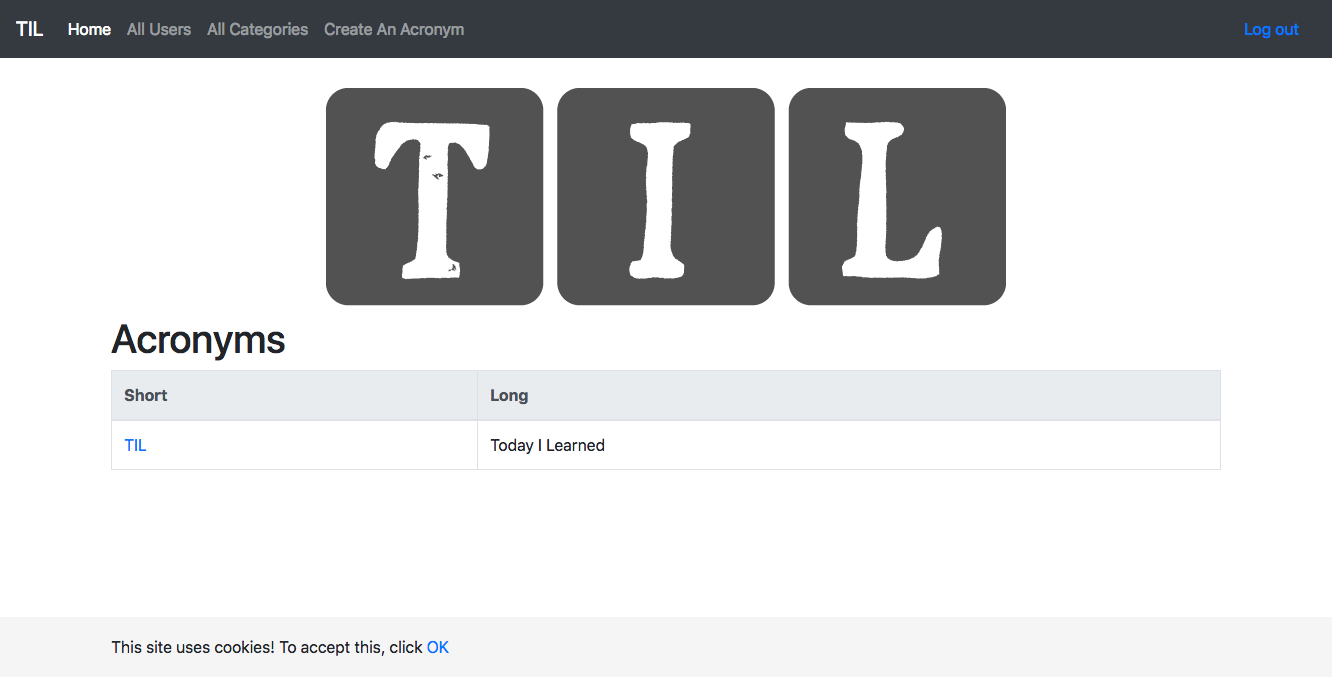
Since the application looks good, confirm the deployment to Production environment in Spinnaker’s dashboard. After a minute or so, you will be able to access the Production version from the Load Balancers page – and as expected, any users, categories and acronyms created in the Canary environment stay in Canary environment without affecting the Production environment.
Deploying a new version
Finally, let’s make sure the whole workflow works just as well as its individual parts. Make a change in the Resources/Views/index.leaf file, then start the entire deployment process with the following commands:
$ git add .
$ git commit -m "Changed 'Long' in table header to 'Looooong'
$ git tag v1.0.1
$ git push gcp –tags
This should trigger Google Container Builder and force it to build new application image, then store it in the Google Container Registry from where will Spinnaker grab it and deploy to the Canary environment. After verifying that the surely magnificent changes you just made to the codebase are exactly what your customers desire, you can confirm push to Production.
And that’s it for now!
…why is it always so difficult to end an article without sounding like the end of a Looney Tunes cartoon? 🐰🤣
Yes, I’m well aware of the irony that just a few articles ago, I tried to show ways how to distance yourself from Google as far away as possible. The only reason why Google Cloud Platform is used in this example over, let’s say, Amazon Web Services or Microsoft Azure, is that for an unnamed project at work, we’re exploring the possibility of using Google Cloud Platform, and as part of the research I was doing, I collected enough material for an article like this. ↩︎